Sweet Loops: An Easy Crochet Doughnut Pattern

These little amigurumi donuts are one of my favorite quick projects to make. The simple design works up quickly, making it perfect for beginners just starting with amigurumi or more experienced crocheters looking for a satisfying afternoon project.
The pattern creates a palm-sized donut that you can customize to your heart's content. Half the fun is experimenting with different "flavors" by playing with frosting colors and decorations. You can keep them simple or add a cute face - they're charming either way and make perfect desk decorations or additions to a play food collection.
I've broken down the instructions into clear, detailed steps below. If you're new to amigurumi, this is a great pattern to practice working in the round and basic increases/decreases.
This post contains affiliate links. As an Amazon Associate, I earn a small commission from qualifying purchases at no extra cost to you. Your support helps me continue creating free crochet patterns and tutorials.
Skill Level and Time Investment
Skill Level: Beginner
- Perfect for crocheters who can:
- Work in continuous rounds
- Single crochet
- Increase
- Basic embroidery for facial features
Time to Complete:
- Total time: 1-2 hours
- Break it down into manageable sessions:
- Donut base: 30 minutes
- Frosting: 30 minutes
- Face details and decoration: 15-30 minutes
- Assembly: 15 minutes
Materials List
Yarn Requirements
For Donut Base:
- Light brown or tan chenille or blanket yarn (I use Big Twist Posh from Joann)
- Recommended: [Yarn brand suggestion with affiliate link]
- Amount needed: Approximately 50g
For Frosting:
- Your choice of color in worsted weight yarn
- Amount needed: Approximately 30g
- Black yarn for mouth
For Sprinkles/Icing (Optional):
- Small amounts of contrast colors for decorations
Tools and Notions
Essential Tools:
- 4.5mm crochet hook (If you get a set like this, it includes all the tools and notions)
- Tapestry needle
- Stitch markers
- Scissors
- Polyester Fiber Fill
- 8mm safety eyes (2)
Project Details
Finished Size
- Approximately 4 inches (10 cm) in diameter
- Center hole: approximately 1 inch (2.5 cm)
Gauge
- Not critical for this project, but consistent tension will give the best results
- Approximately 6 sts = 1 inch in single crochet
Customization Options
- Change frosting colors for different flavors
- Add sprinkles in various colors
- Create drizzle icing patterns
- Experiment with different mouth expressions
Abbreviations and Techniques
Standard Abbreviations
- ch: chain
- sc: single crochet
- inc: increase (2 sc in same stitch)
- sl st: slip stitch
- rnd: round
Special Techniques
Invisible Increase:
When performing an invisible increase, you essentially work two stitches into the same stitch, but the first stitch is only worked through the front loop of the stitch, while the second stitch is worked through both loops, creating a more subtle increase.
Invisible Fasten Off:
- Complete your last stitch, leaving a yarn tail at least 6"
- Pull the yarn through the last loop with the hook and thread the yarn through a tapestry needle.
- Skip one stitch, then insert your needle under both loops of the following stitch, working from front to back
- Bring the needle back and insert it under the back loop of the stitch where your yarn tail originated
- Pull the yarn tail through, adjusting tension to match your other stitches
Pattern Notes
- Work in continuous rounds unless specified otherwise
- Use stitch markers to keep track of rounds
- The piece may start curling - this is normal and addressed in the pattern
- Stuff the donut firmly but not so much that the stitches stretch
Detailed Instructions
Donut Base
With tan or brown yarn.
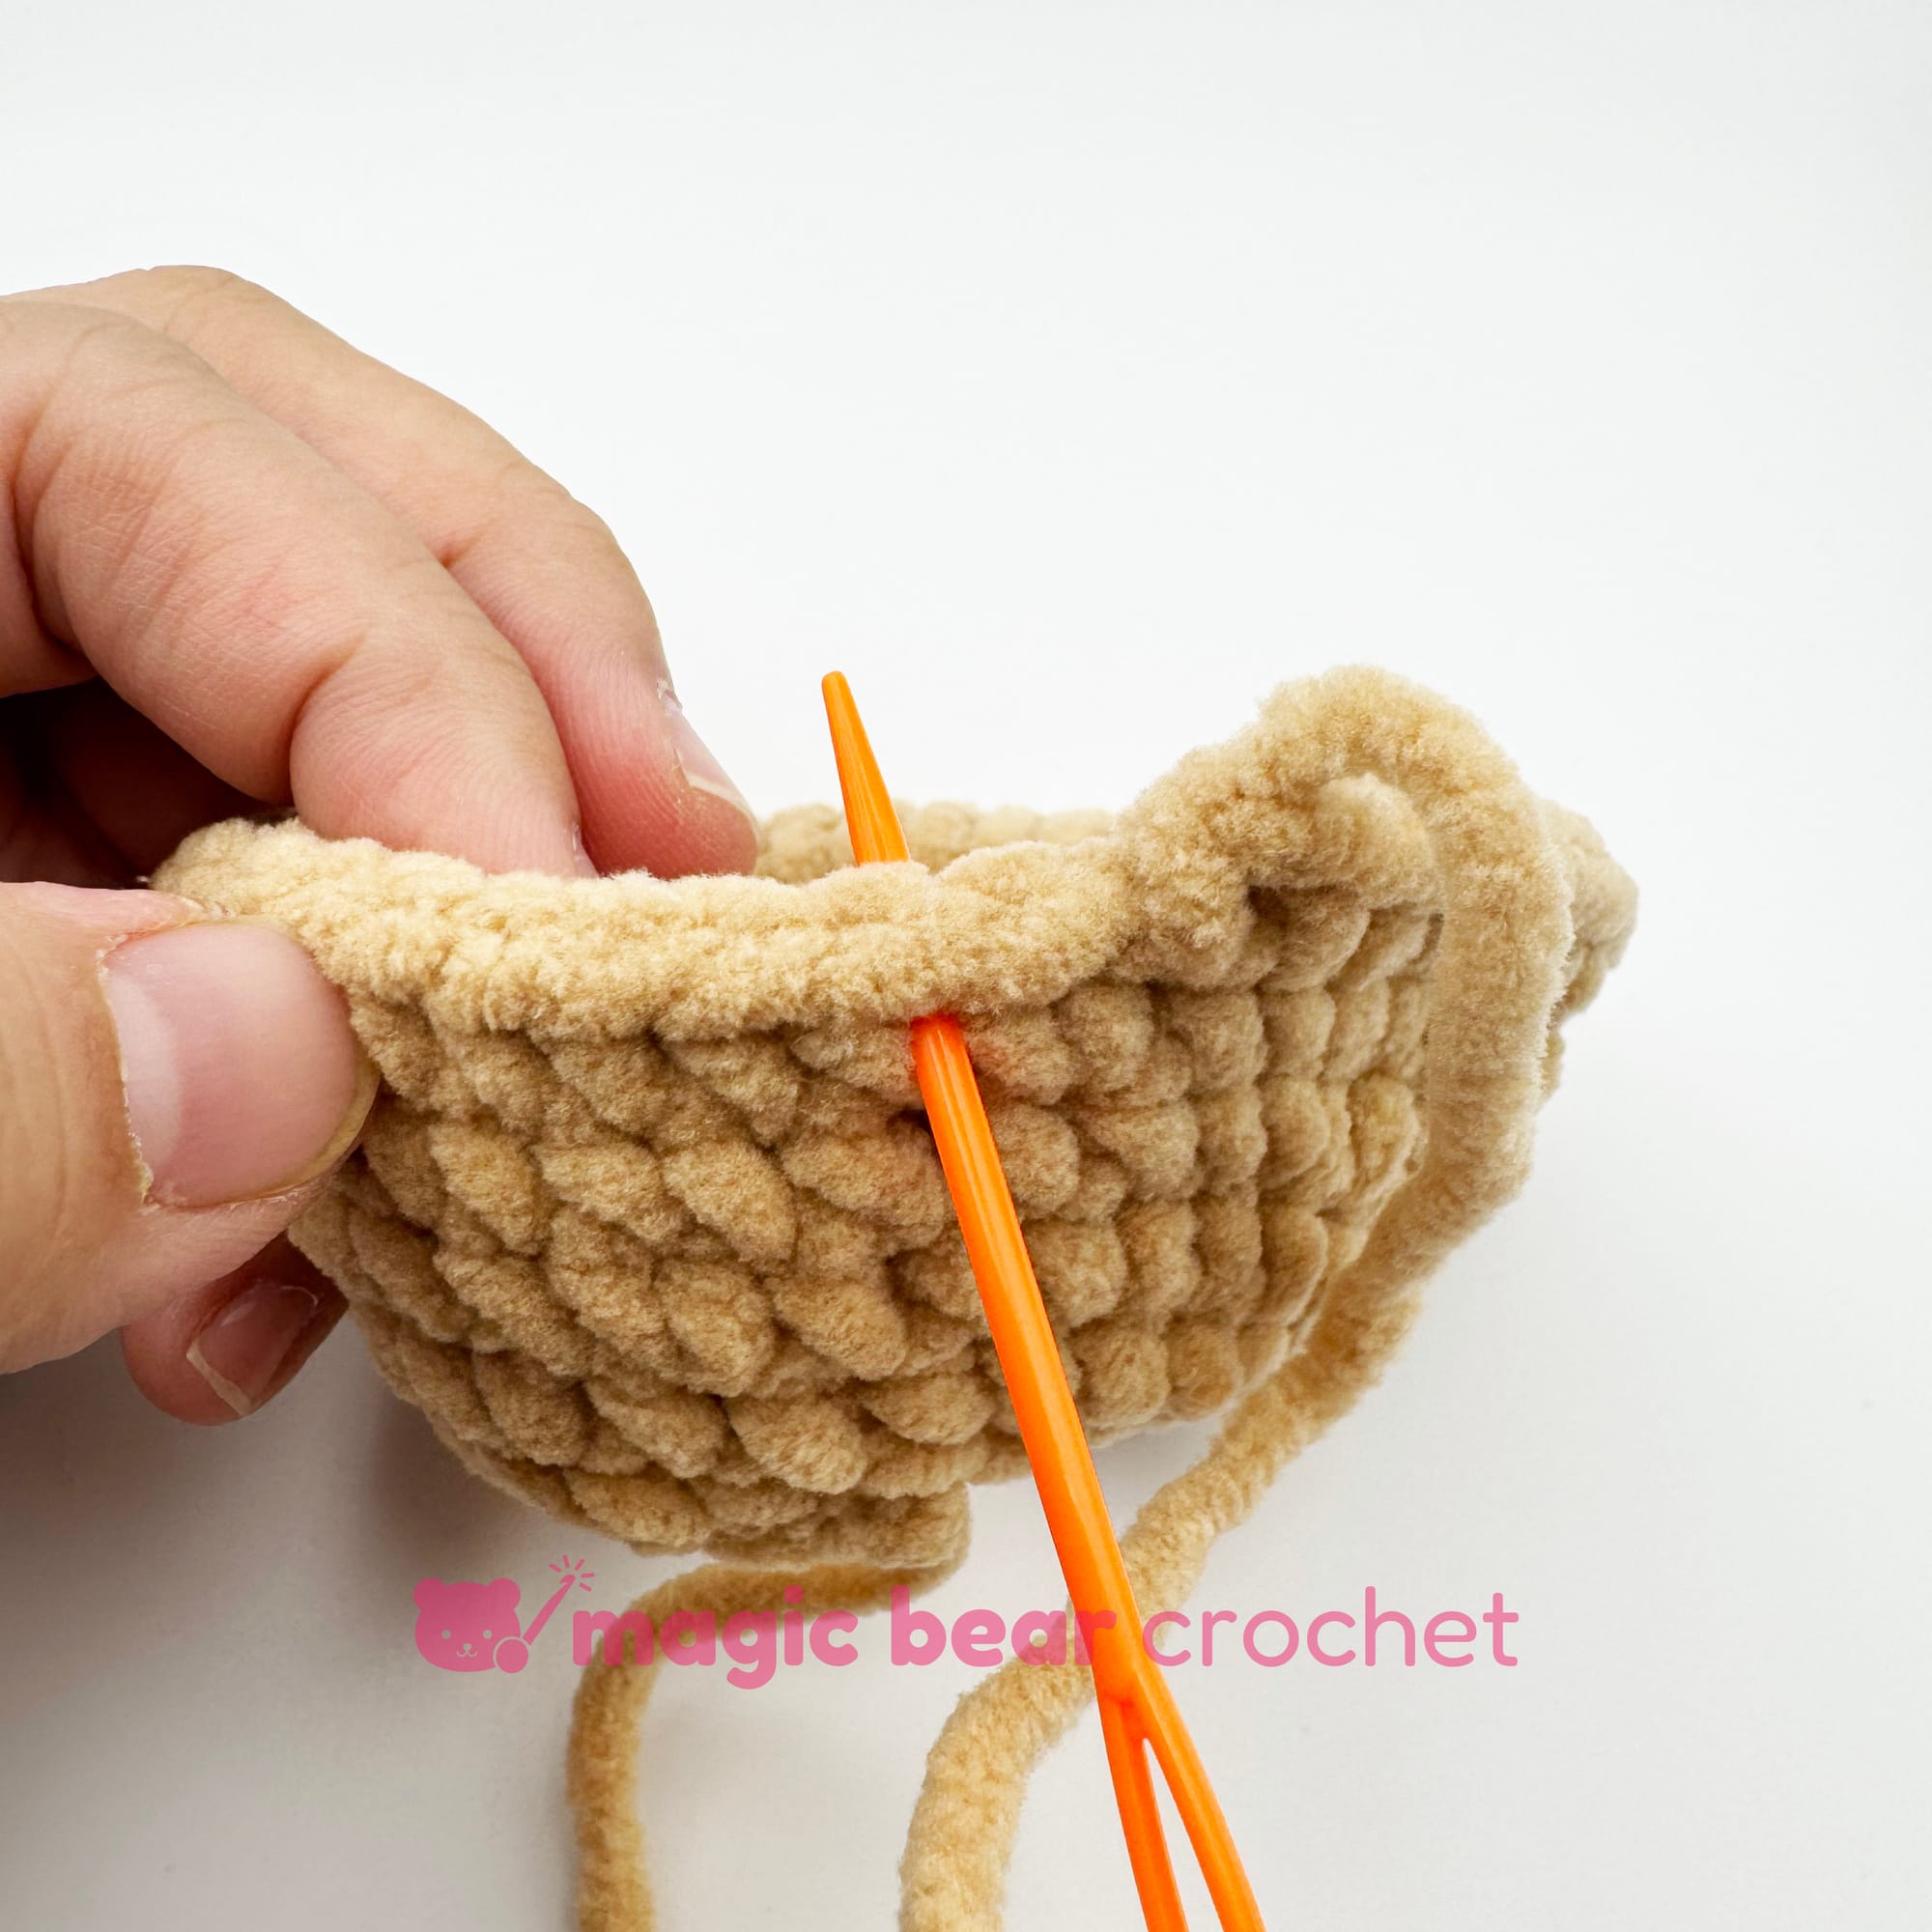
Rnd 1: ch 18. Bend the chain into a U, being careful not to twist it, and sl st in the front loop of the first stitch [18 sts]

Rnd 2: (2 sc, inc) x 6 [24 sts]
Rnd 3: sc, inc, (3 sc, inc) x 5, 2 sc [30 sts]
Rnd 4: (4 sc, inc) x 6 [36 sts]
Rnd 5: 2 sc, inc (5 sc, inc) x 5, 3 sc [42 sts]
Rnd 6: 42 sc [42 sts]
Invisible fasten off.
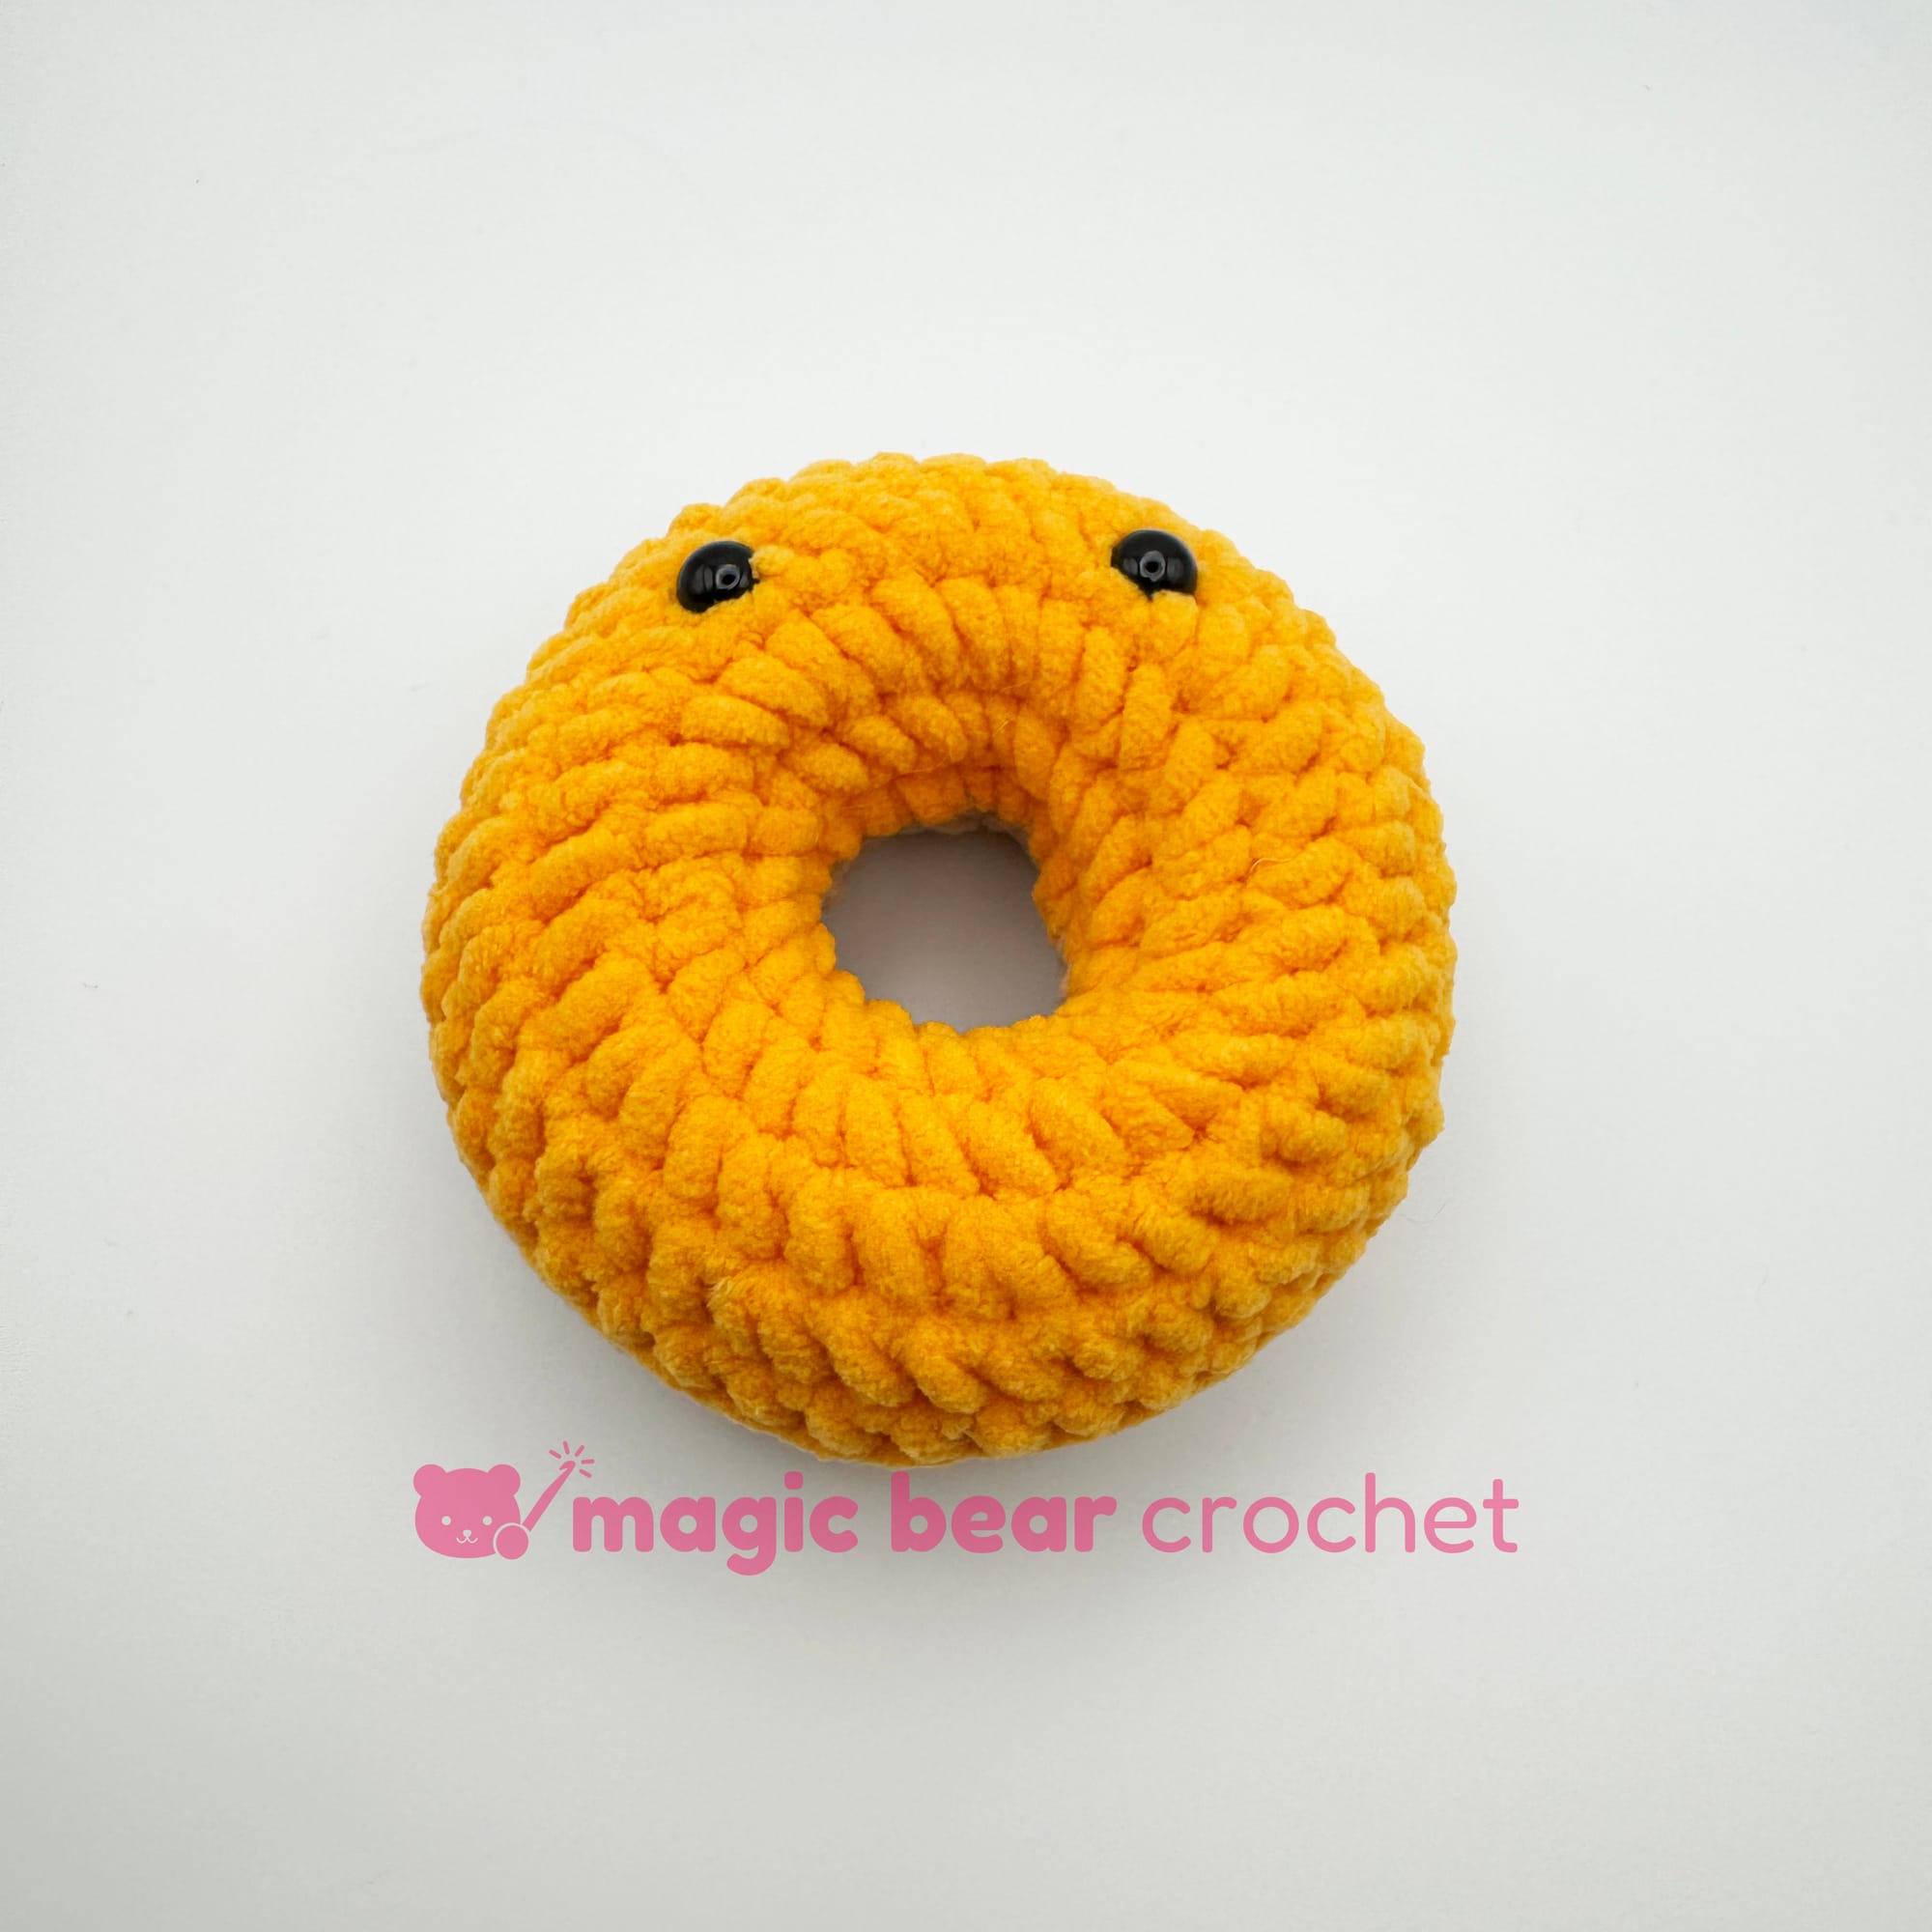
Frosting
With frosting colored yarn.
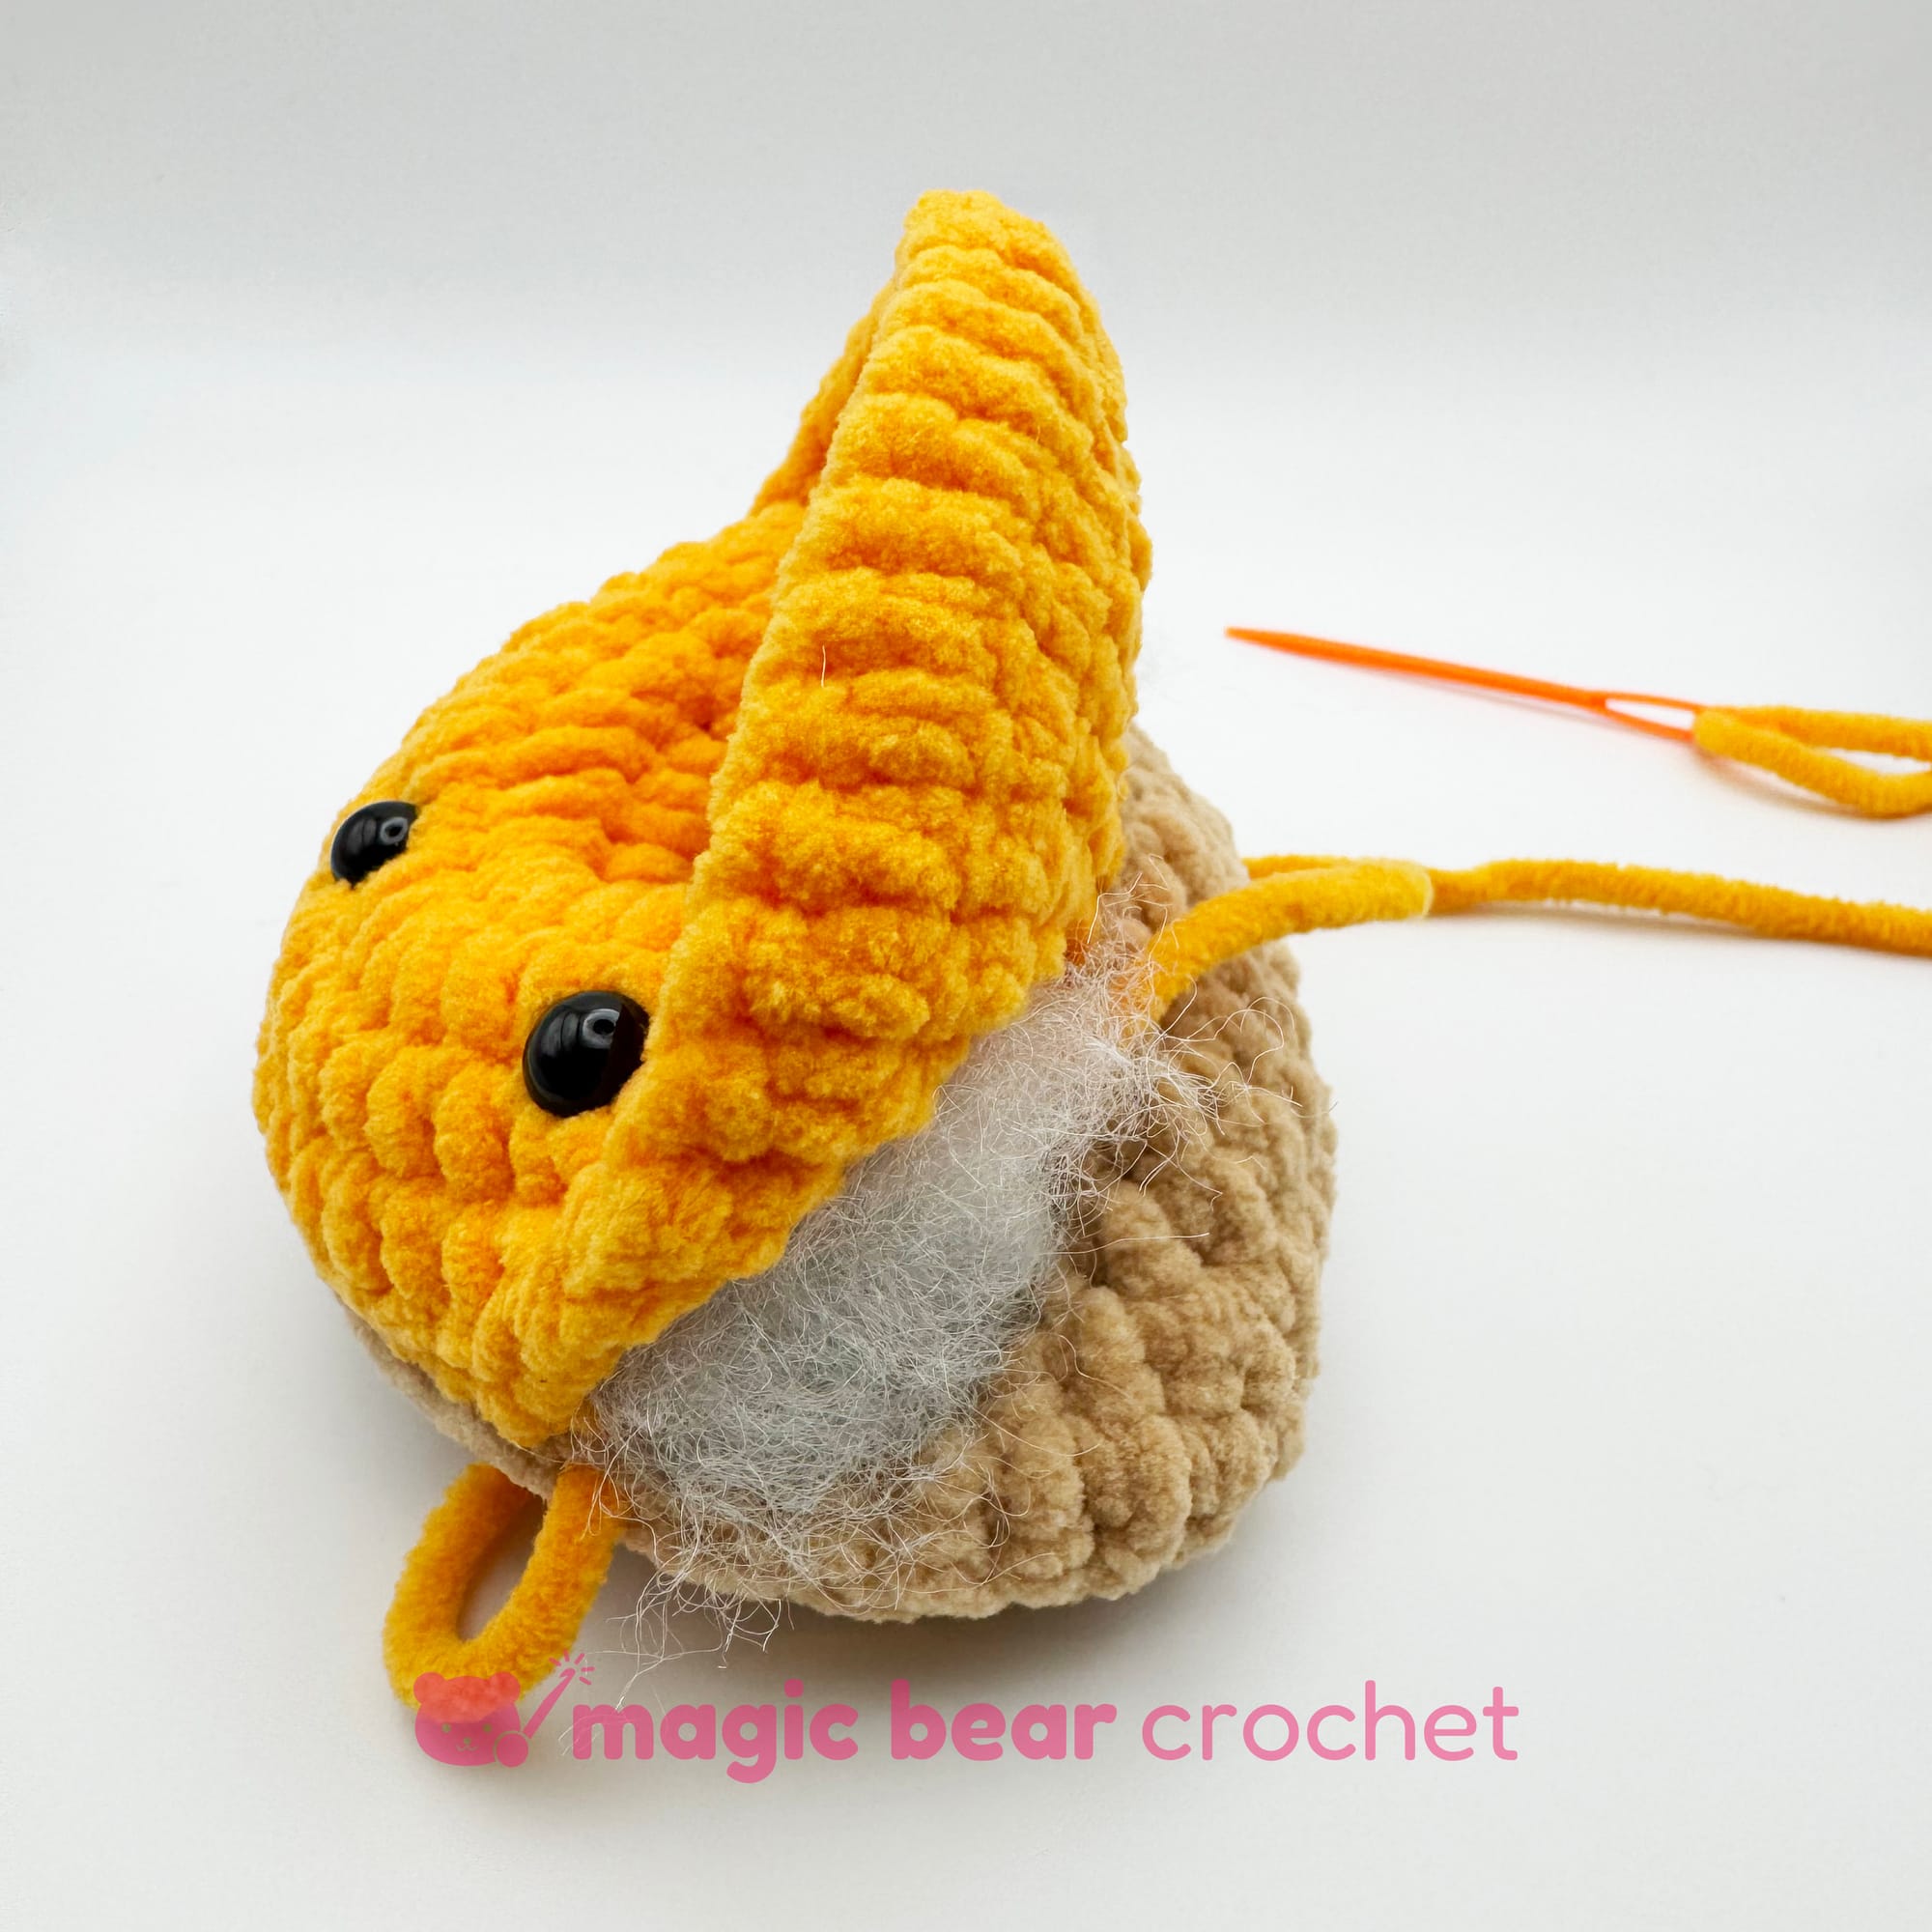
Rnd 1: With the wrong side of the donut base facing you, insert your hook into one of the stitches from the inner circle of the base. Sc all around. [18 sts]
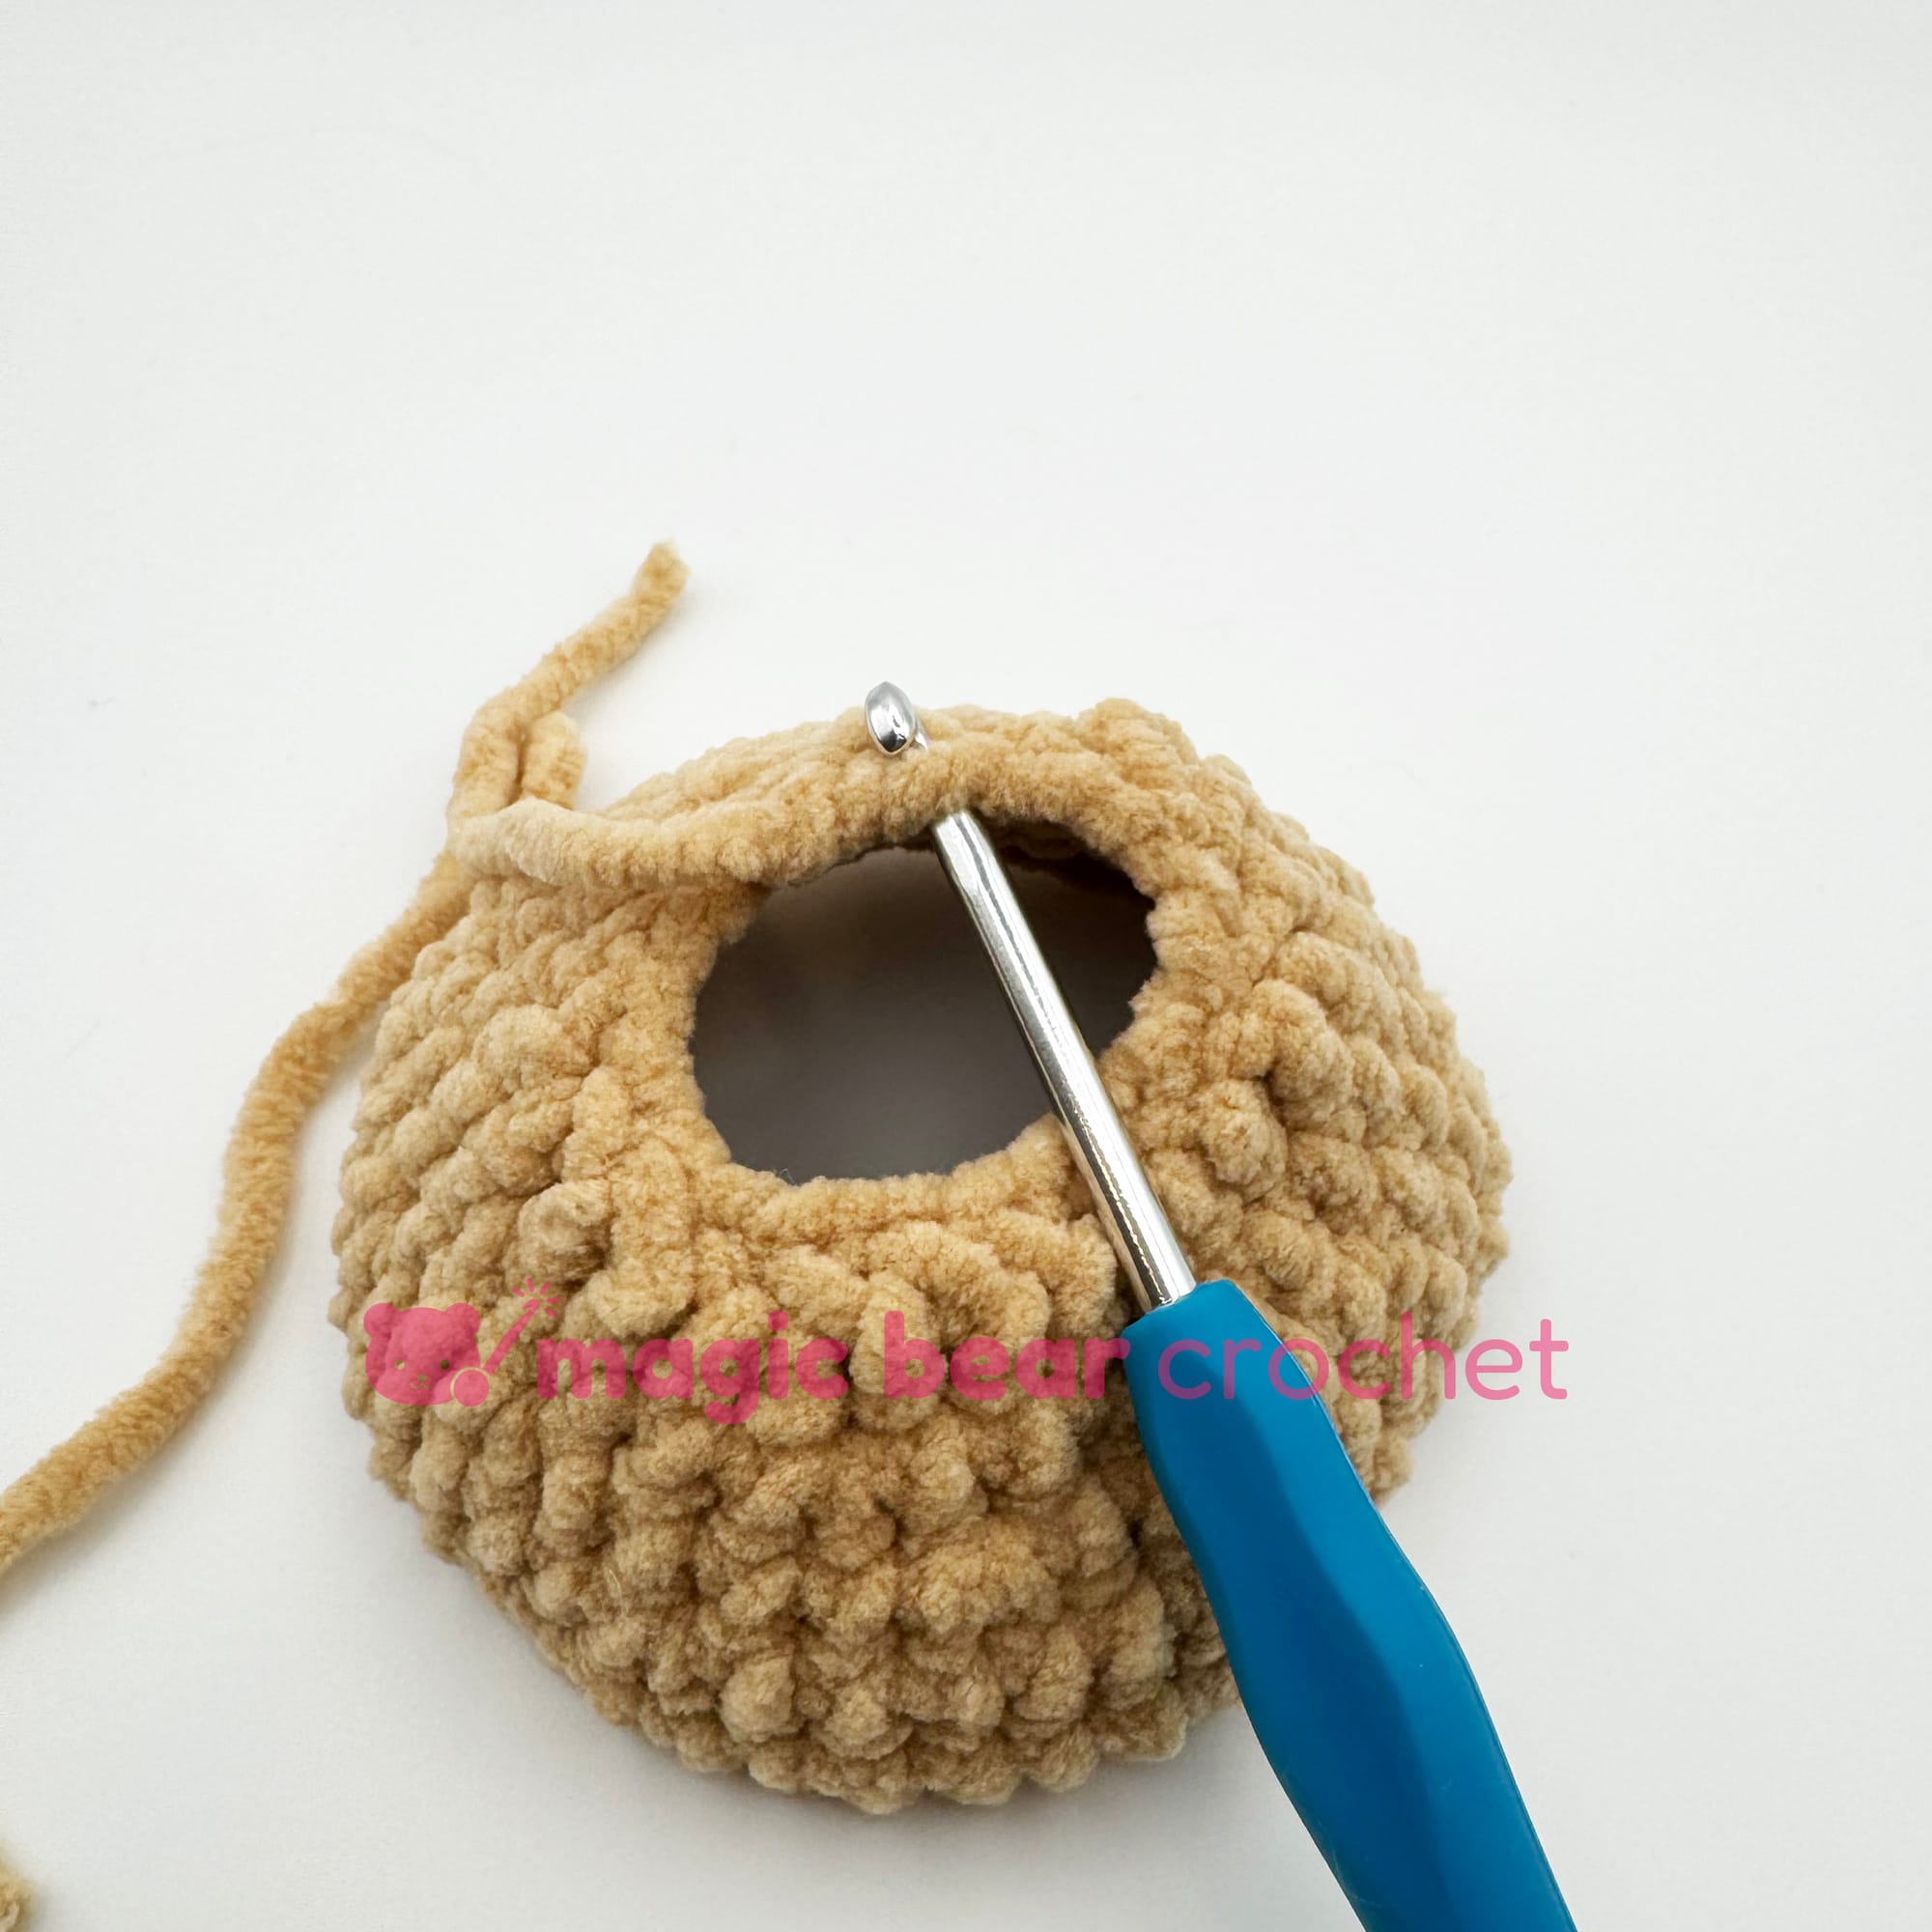
Rnd 2: (2 sc, inc) x 6 [24 sts]
Rnd 3: sc, inc, (3 sc, inc) x 5, 2 sc [30 sts]
Rnd 4: (4 sc, inc) x 6 [36 sts]
Rnd 5: 2 sc, inc (5 sc, inc) x 5, 3 sc [42 sts]
Rnd 6: 42 sc [42 sts]
Invisible fasten off, leaving tail at least two times the circumference of the frosting.
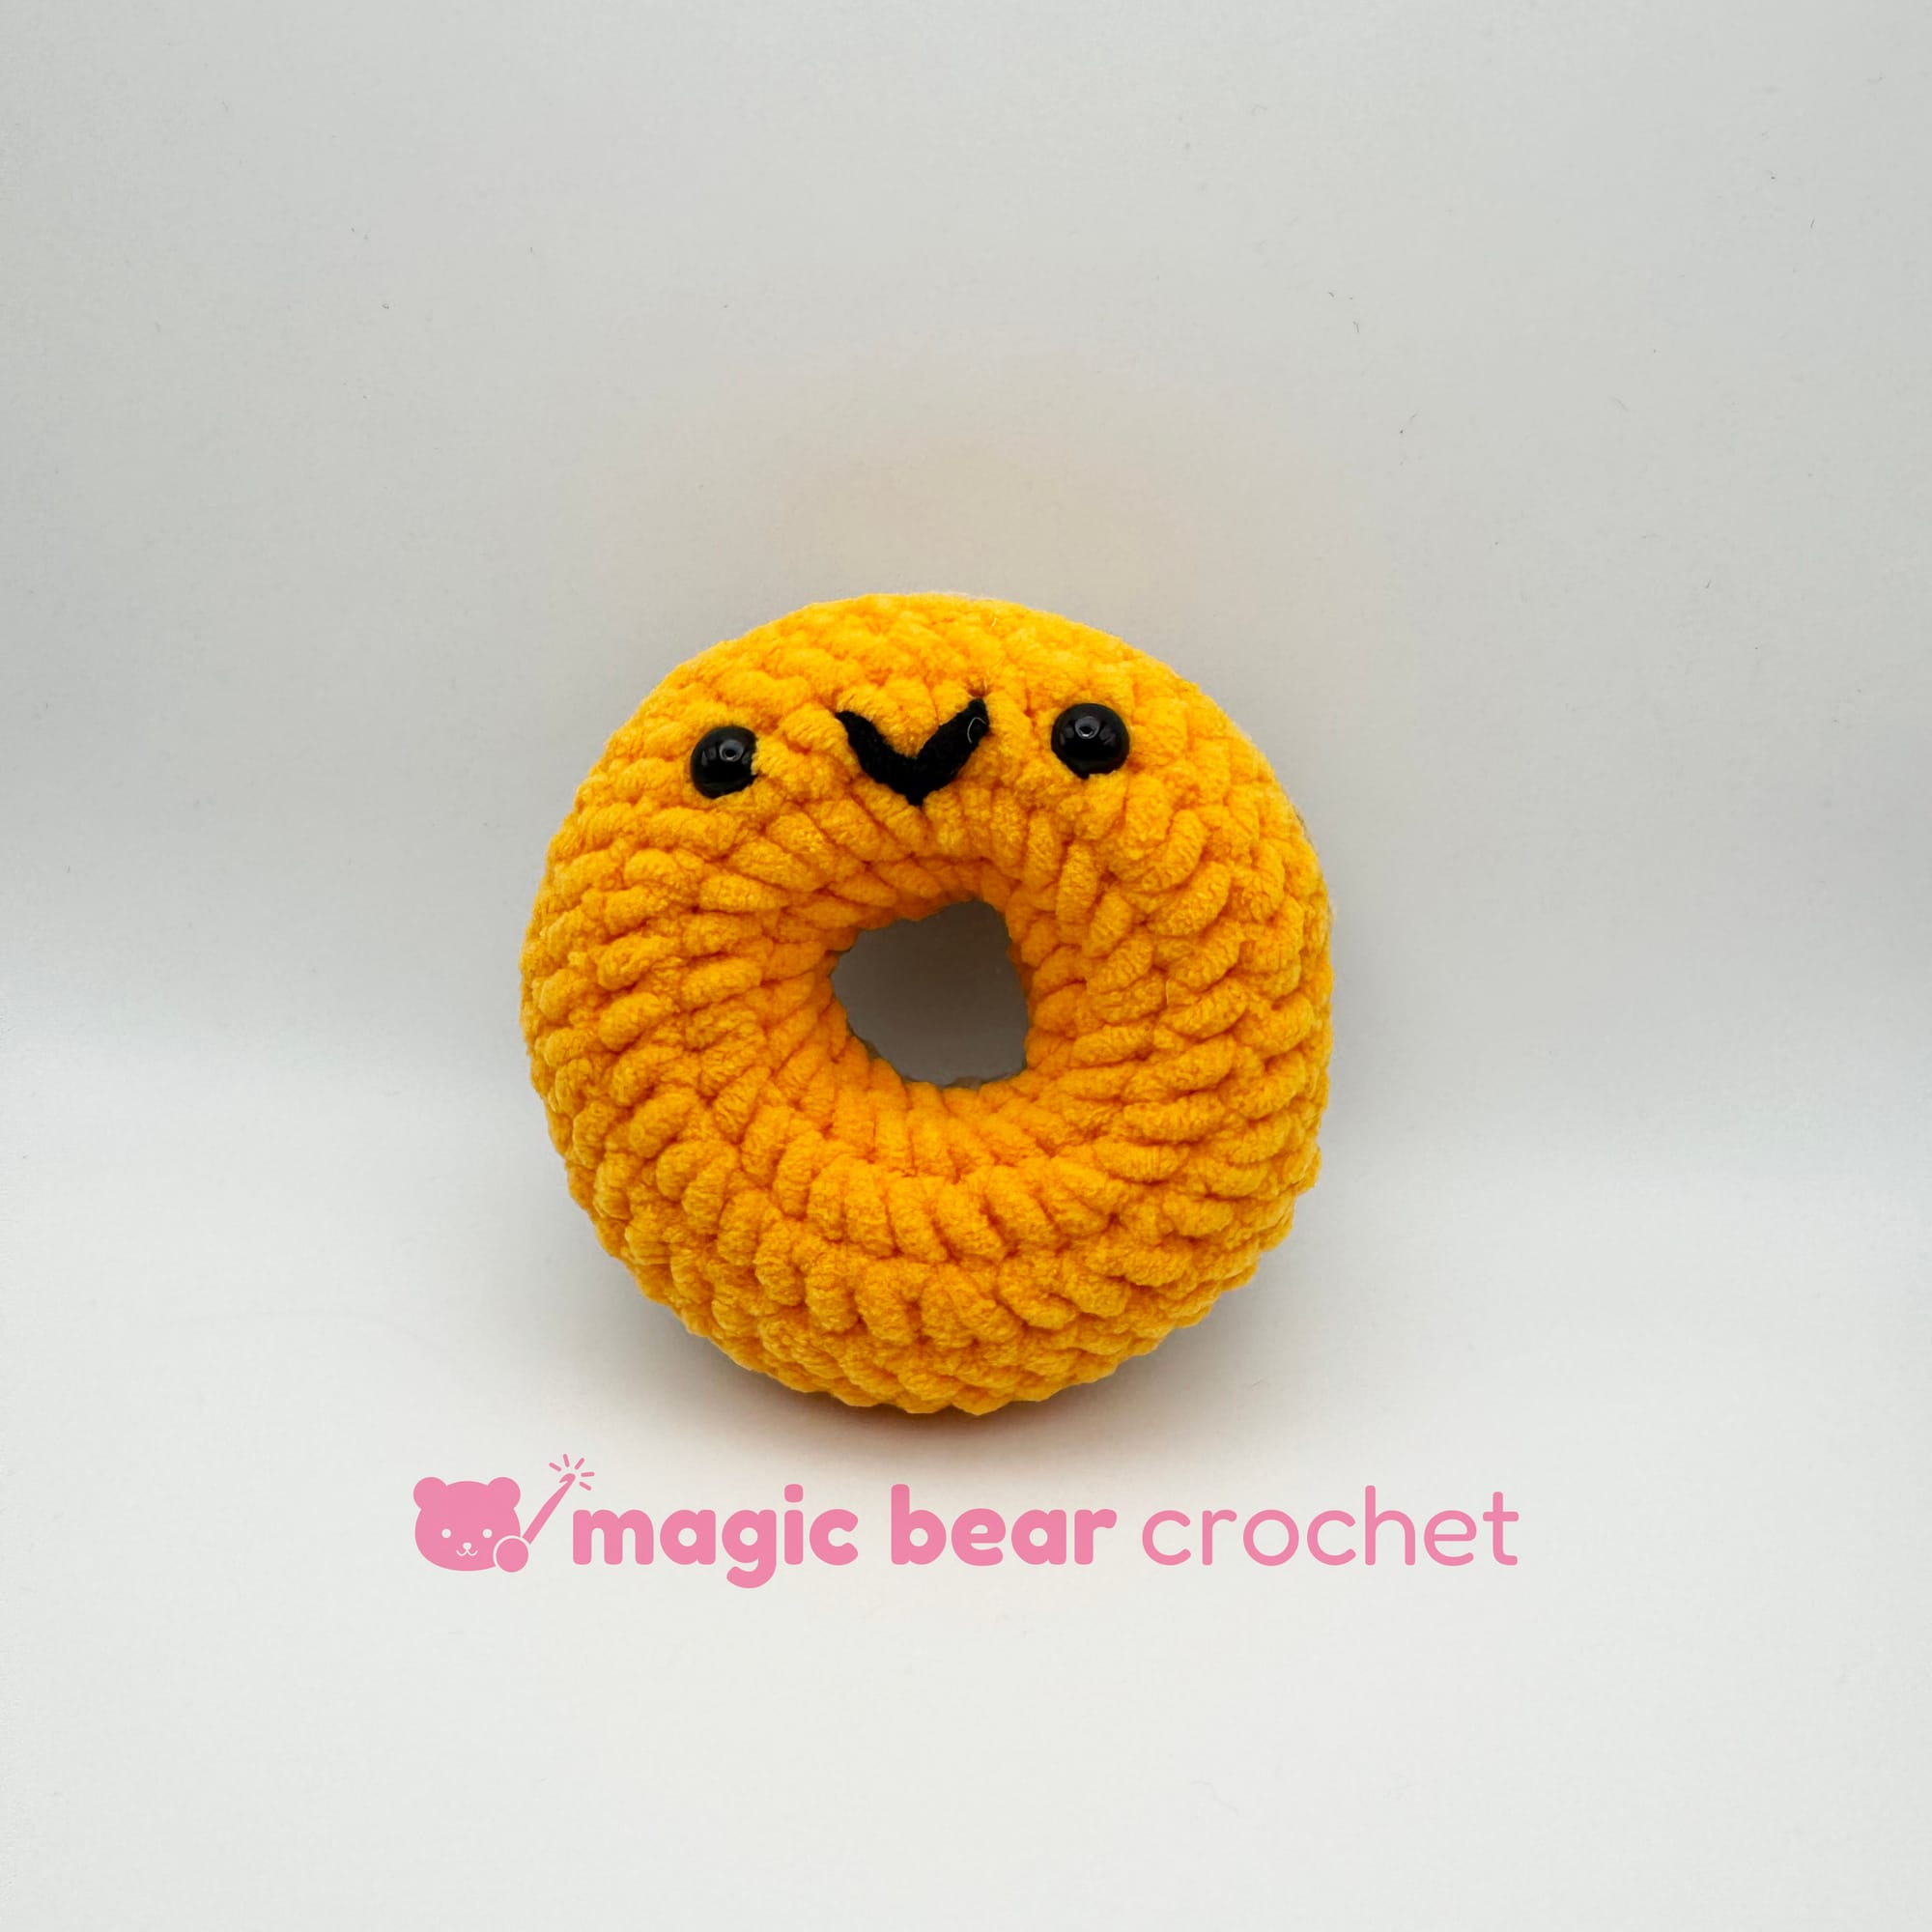
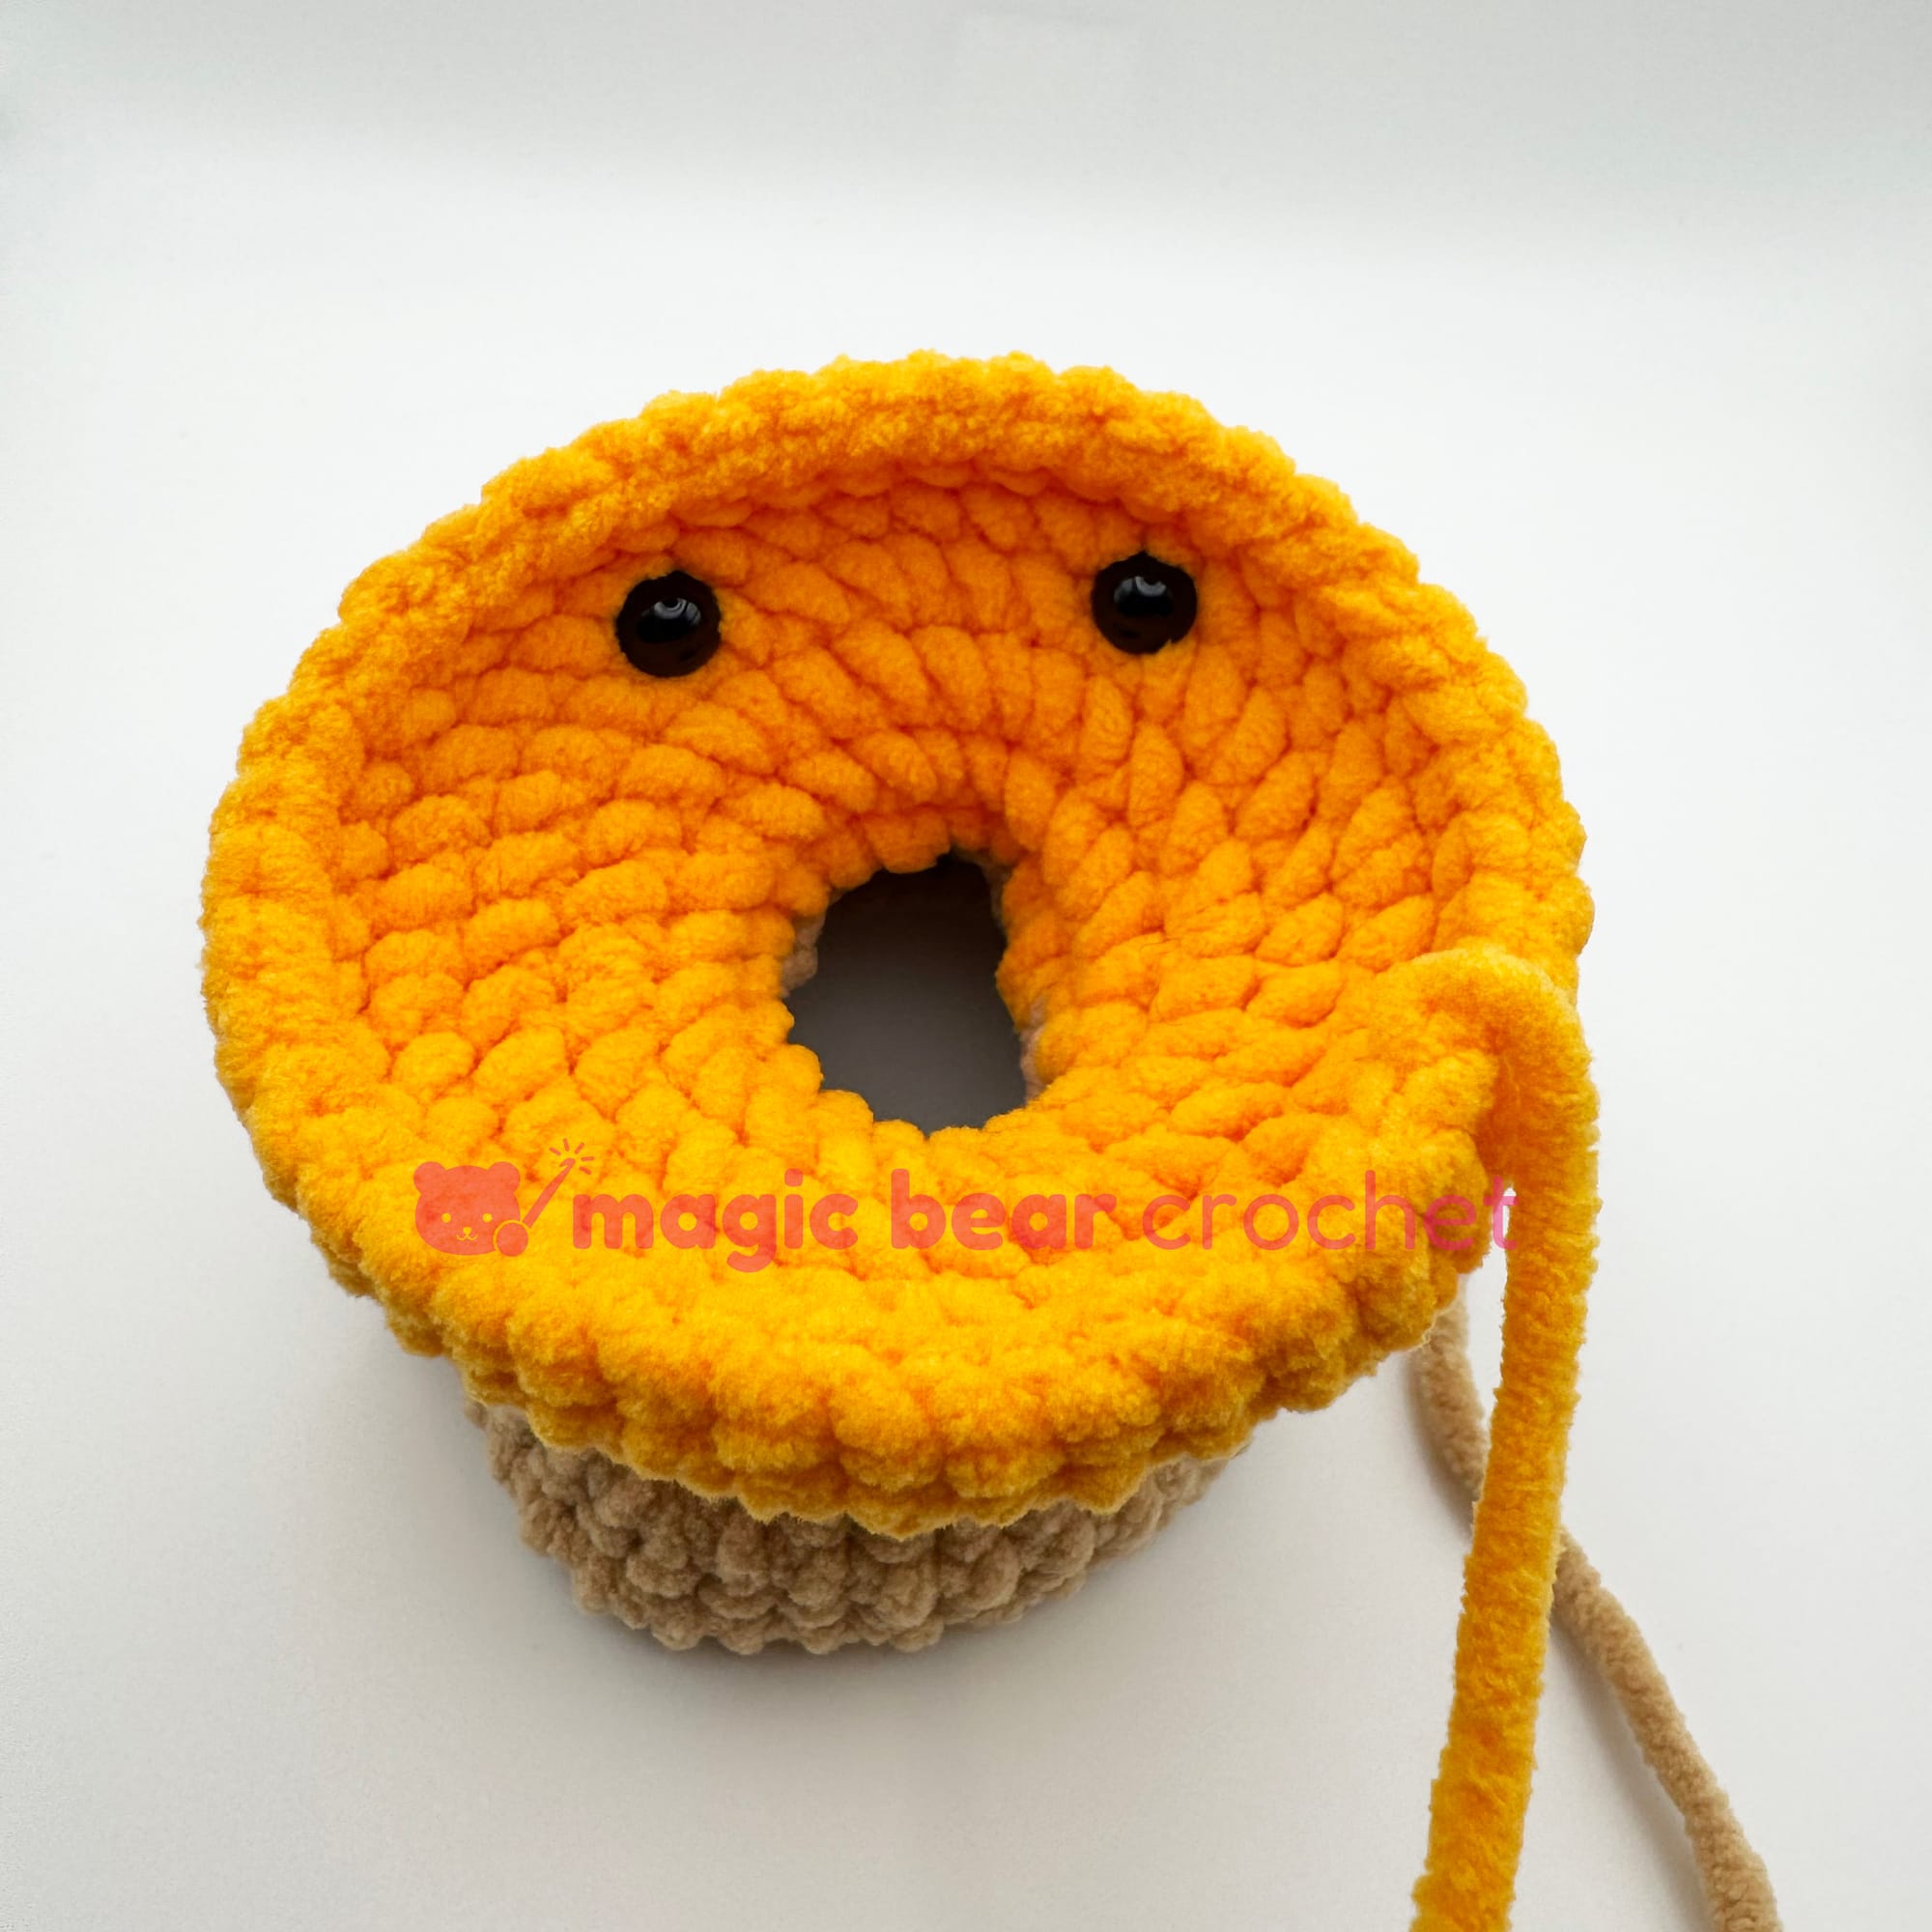
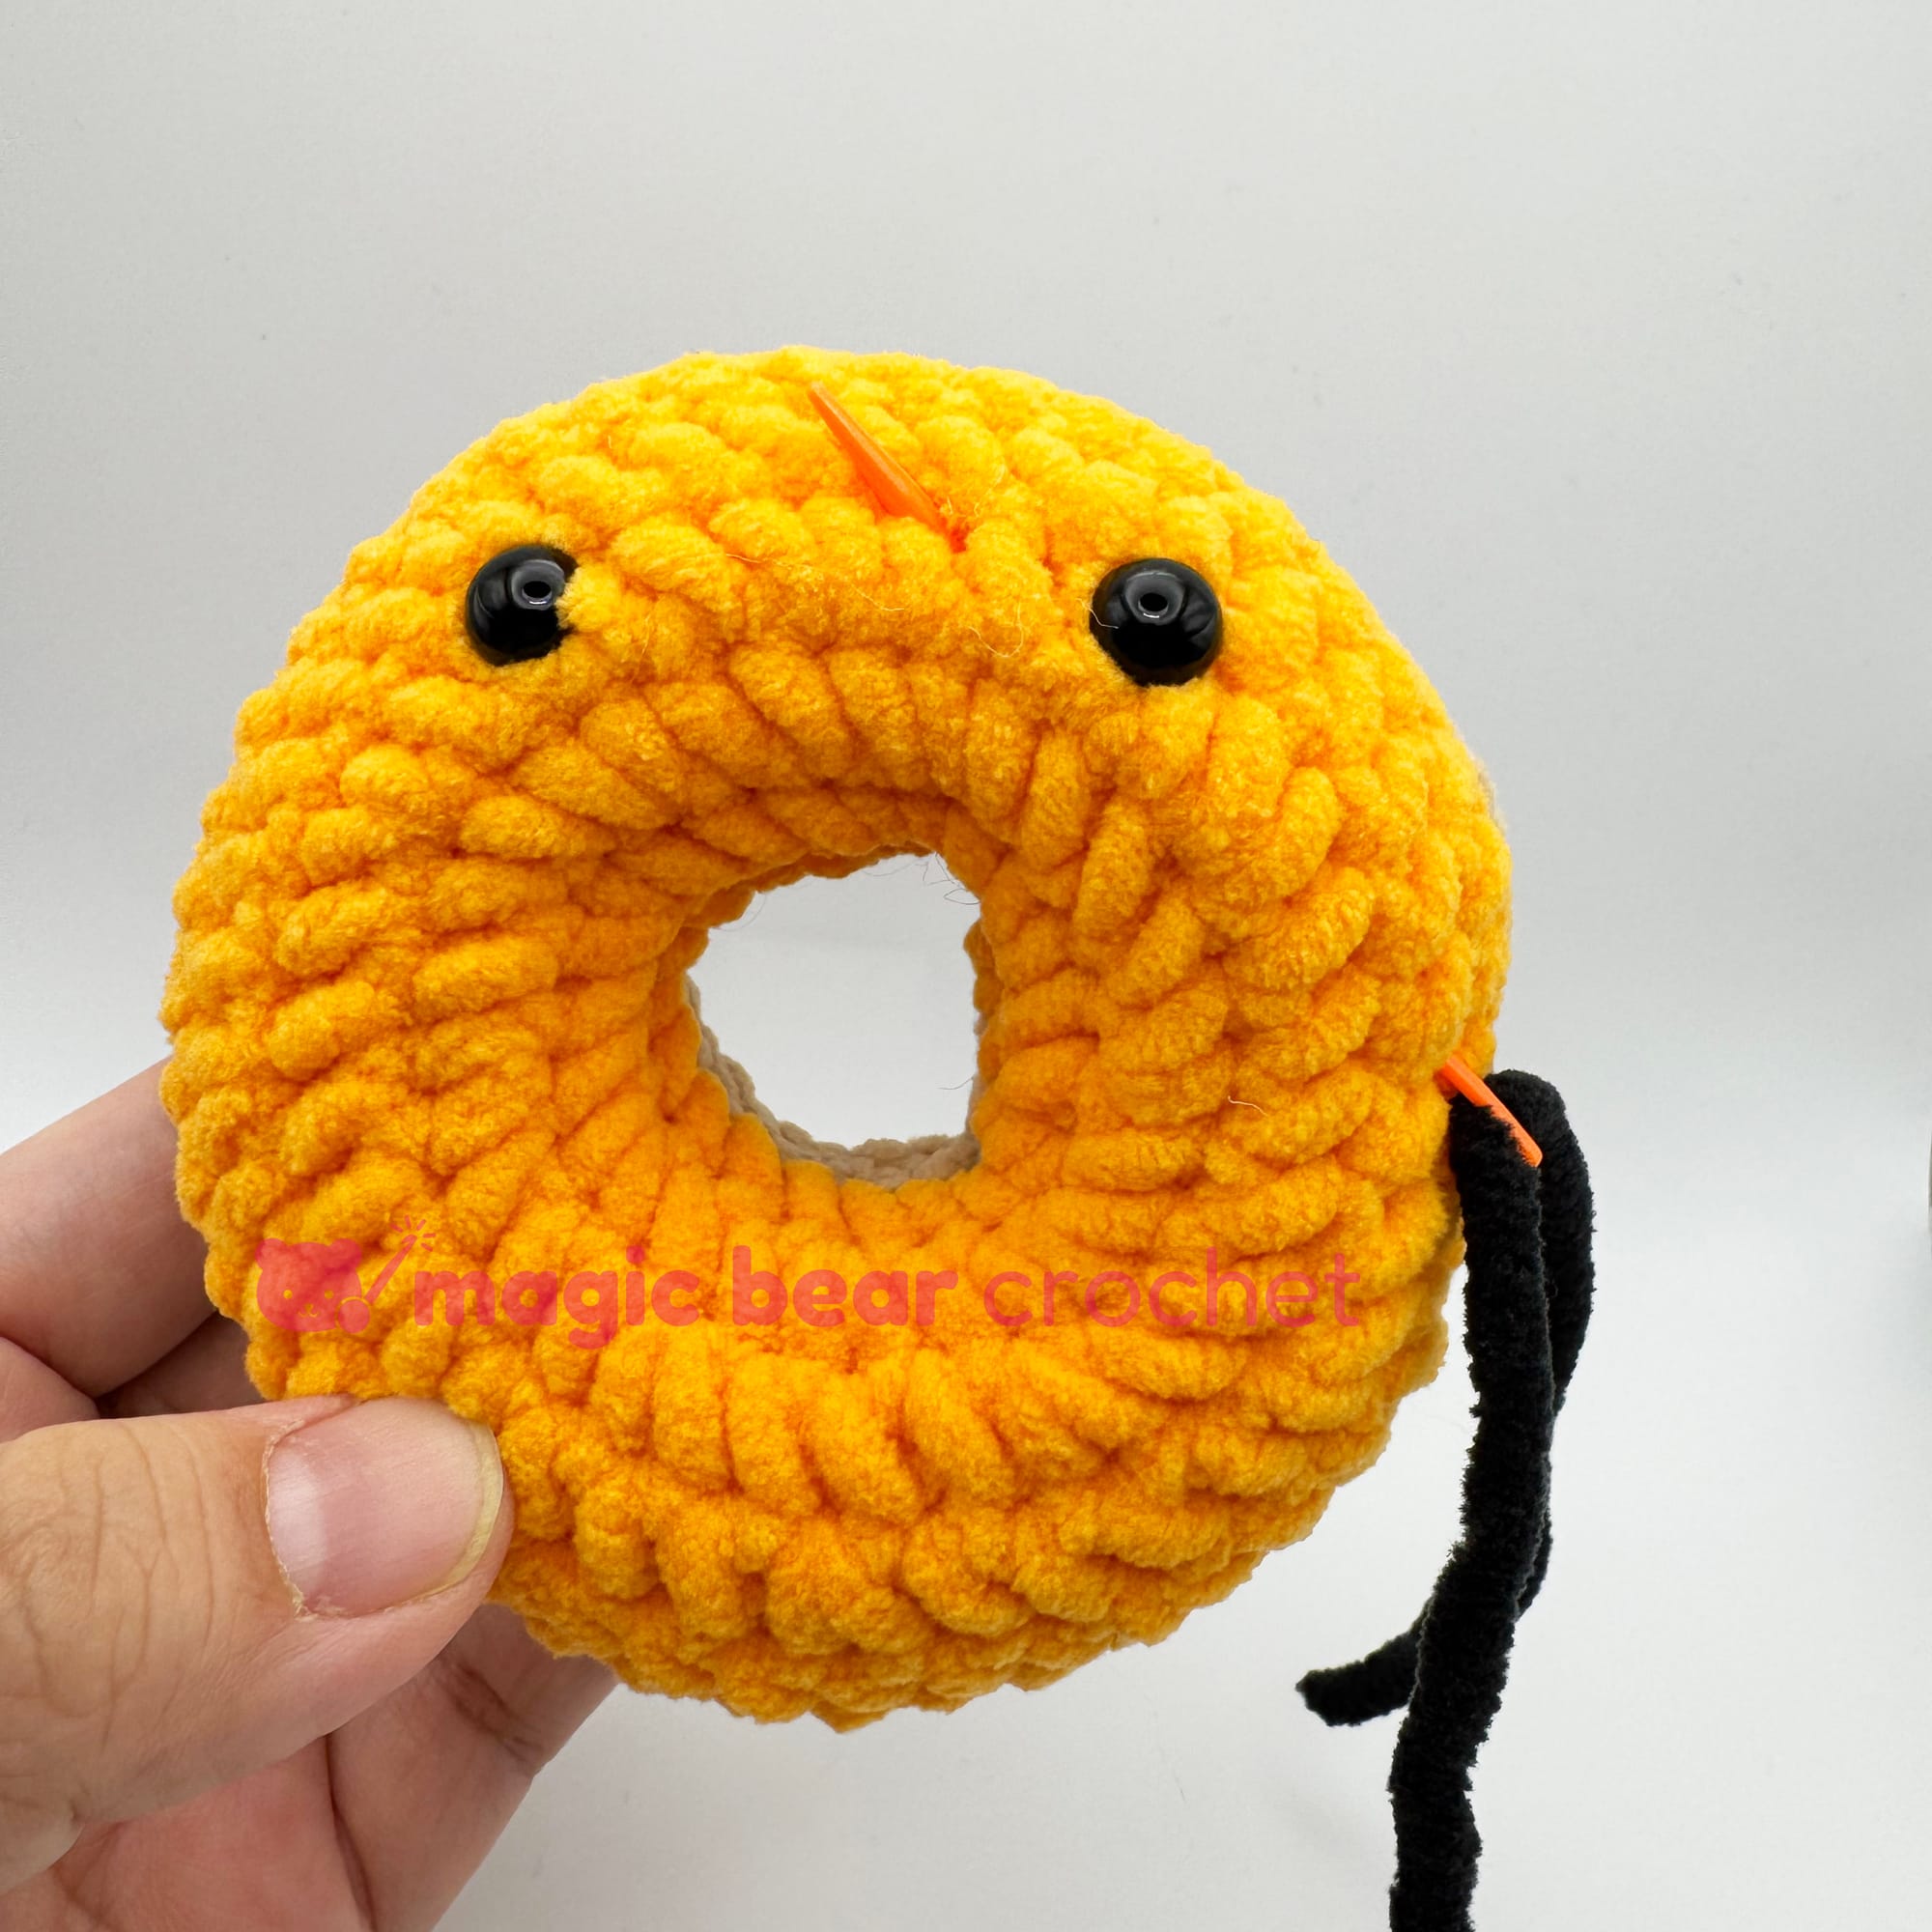
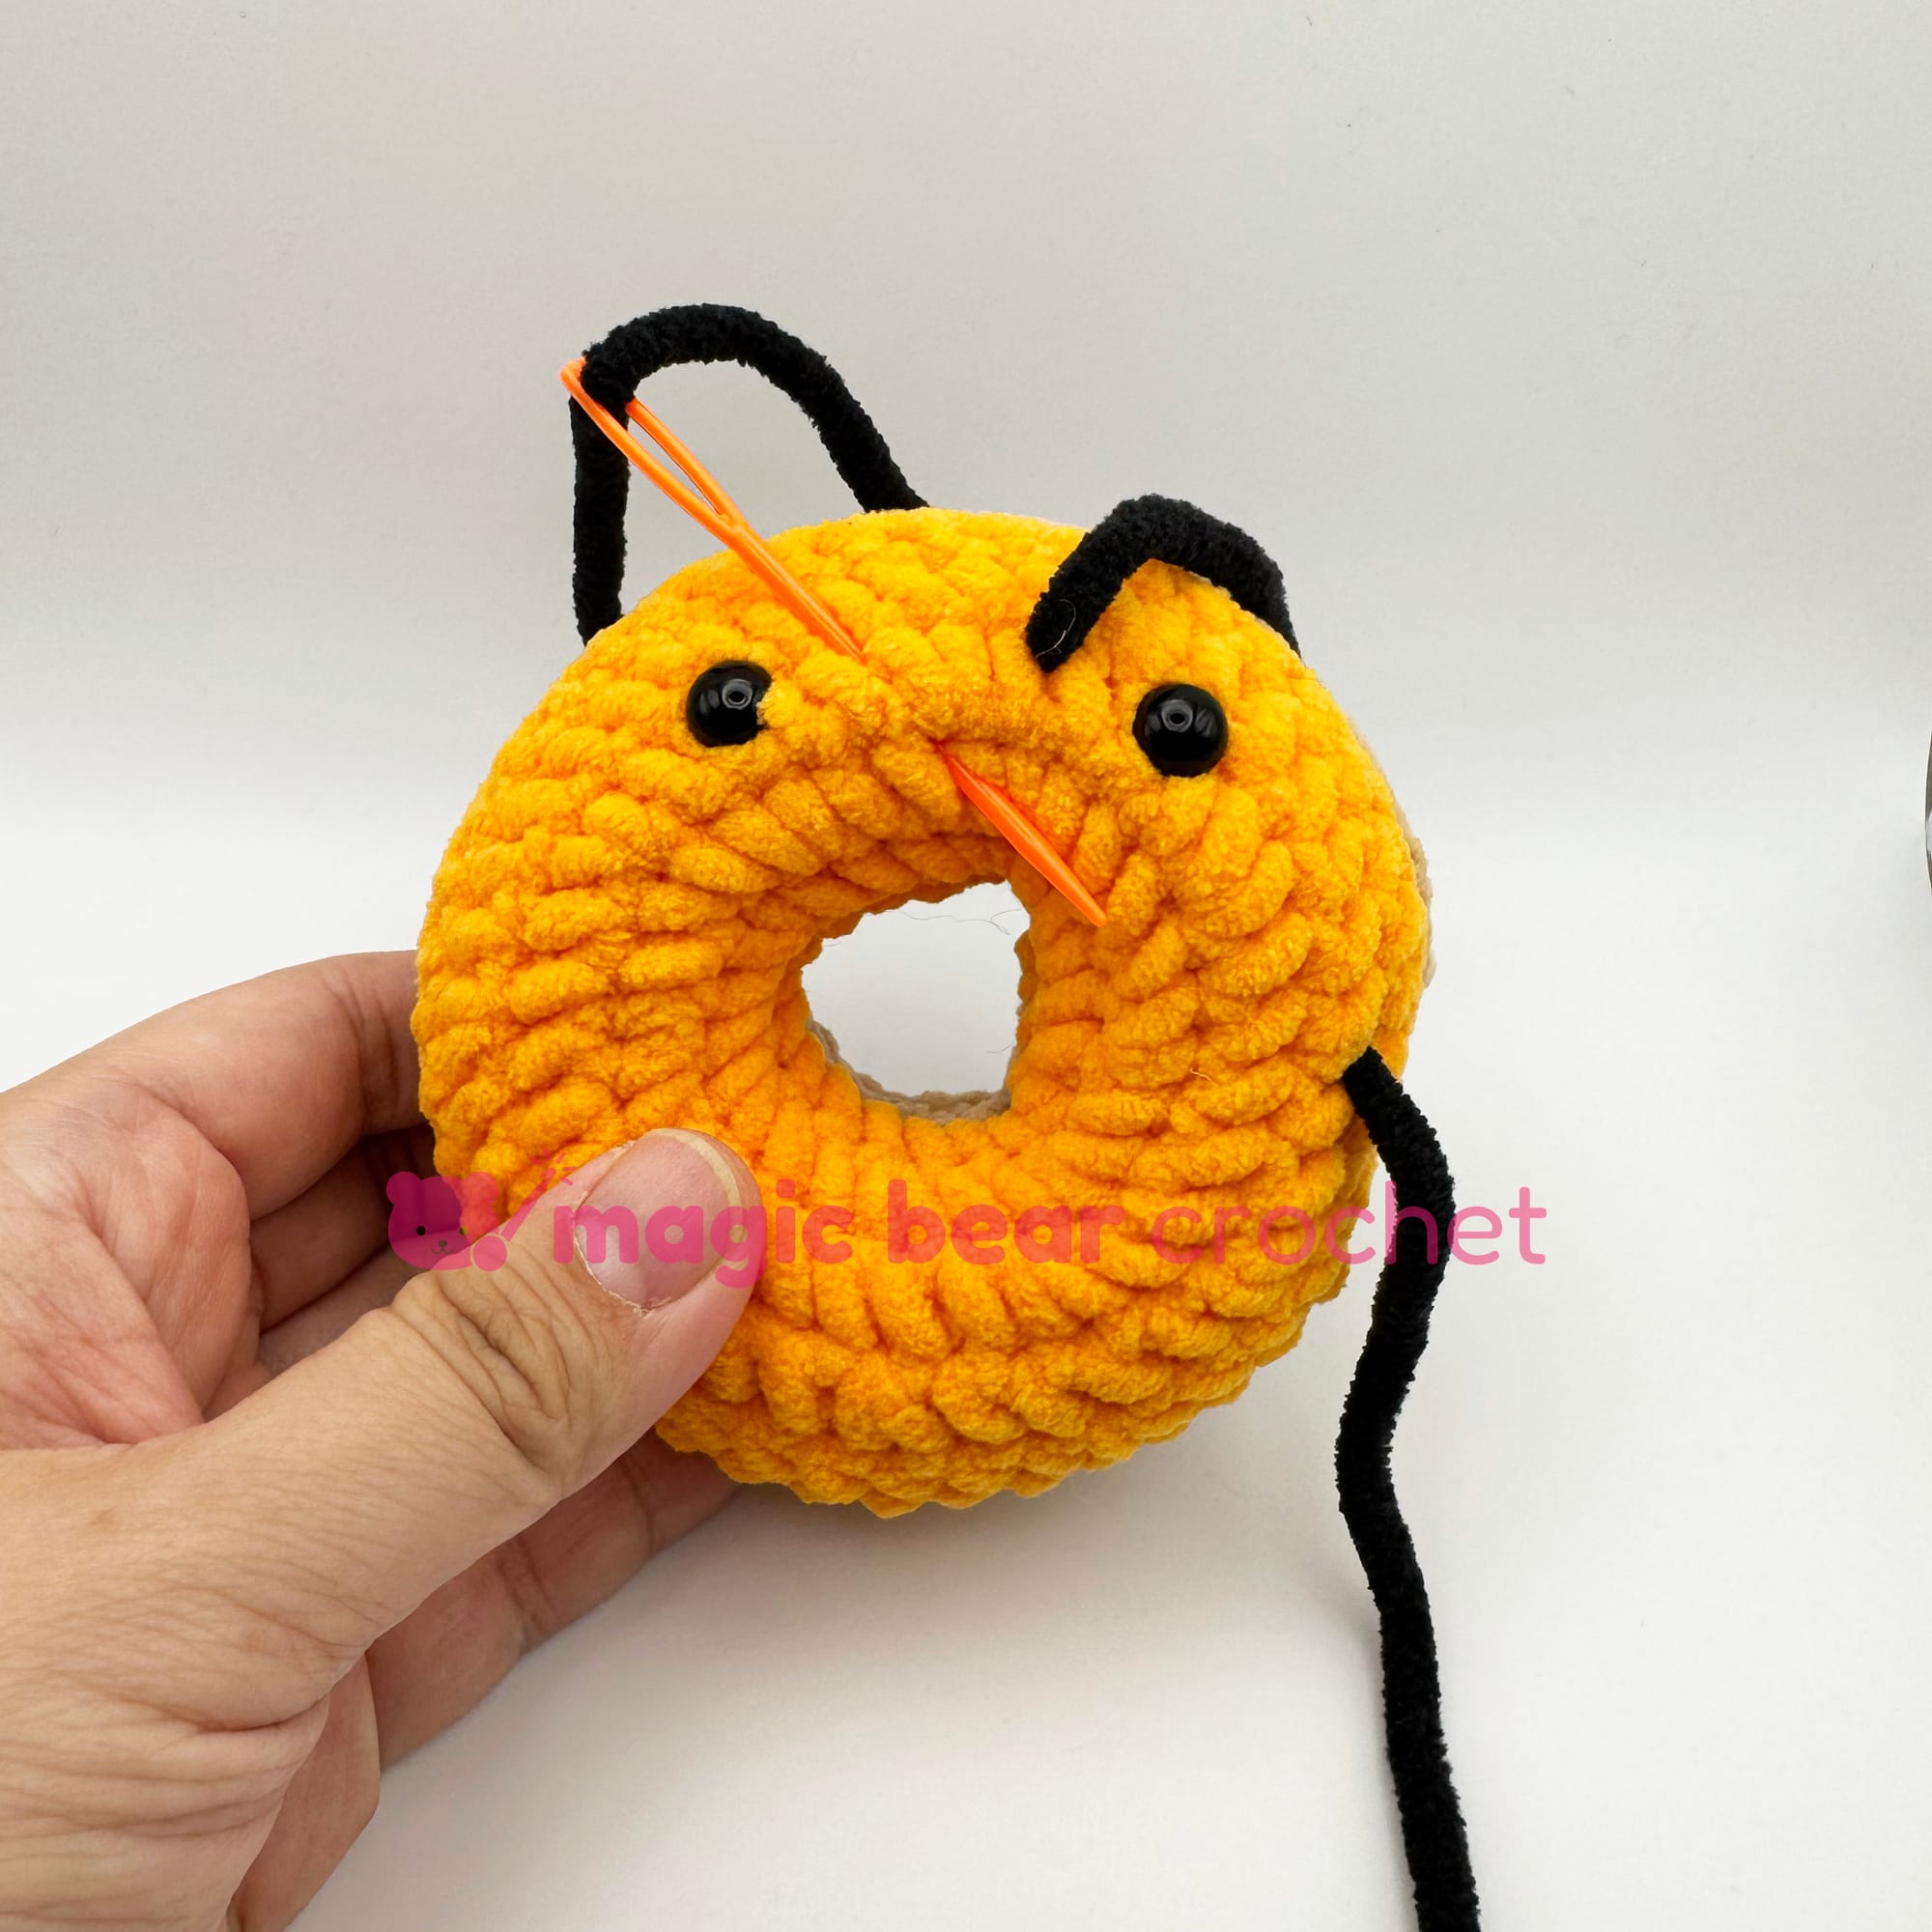
Attach the eyes on the right side of the piece, between rounds 4 and 5 with a 7-stitch space between them.
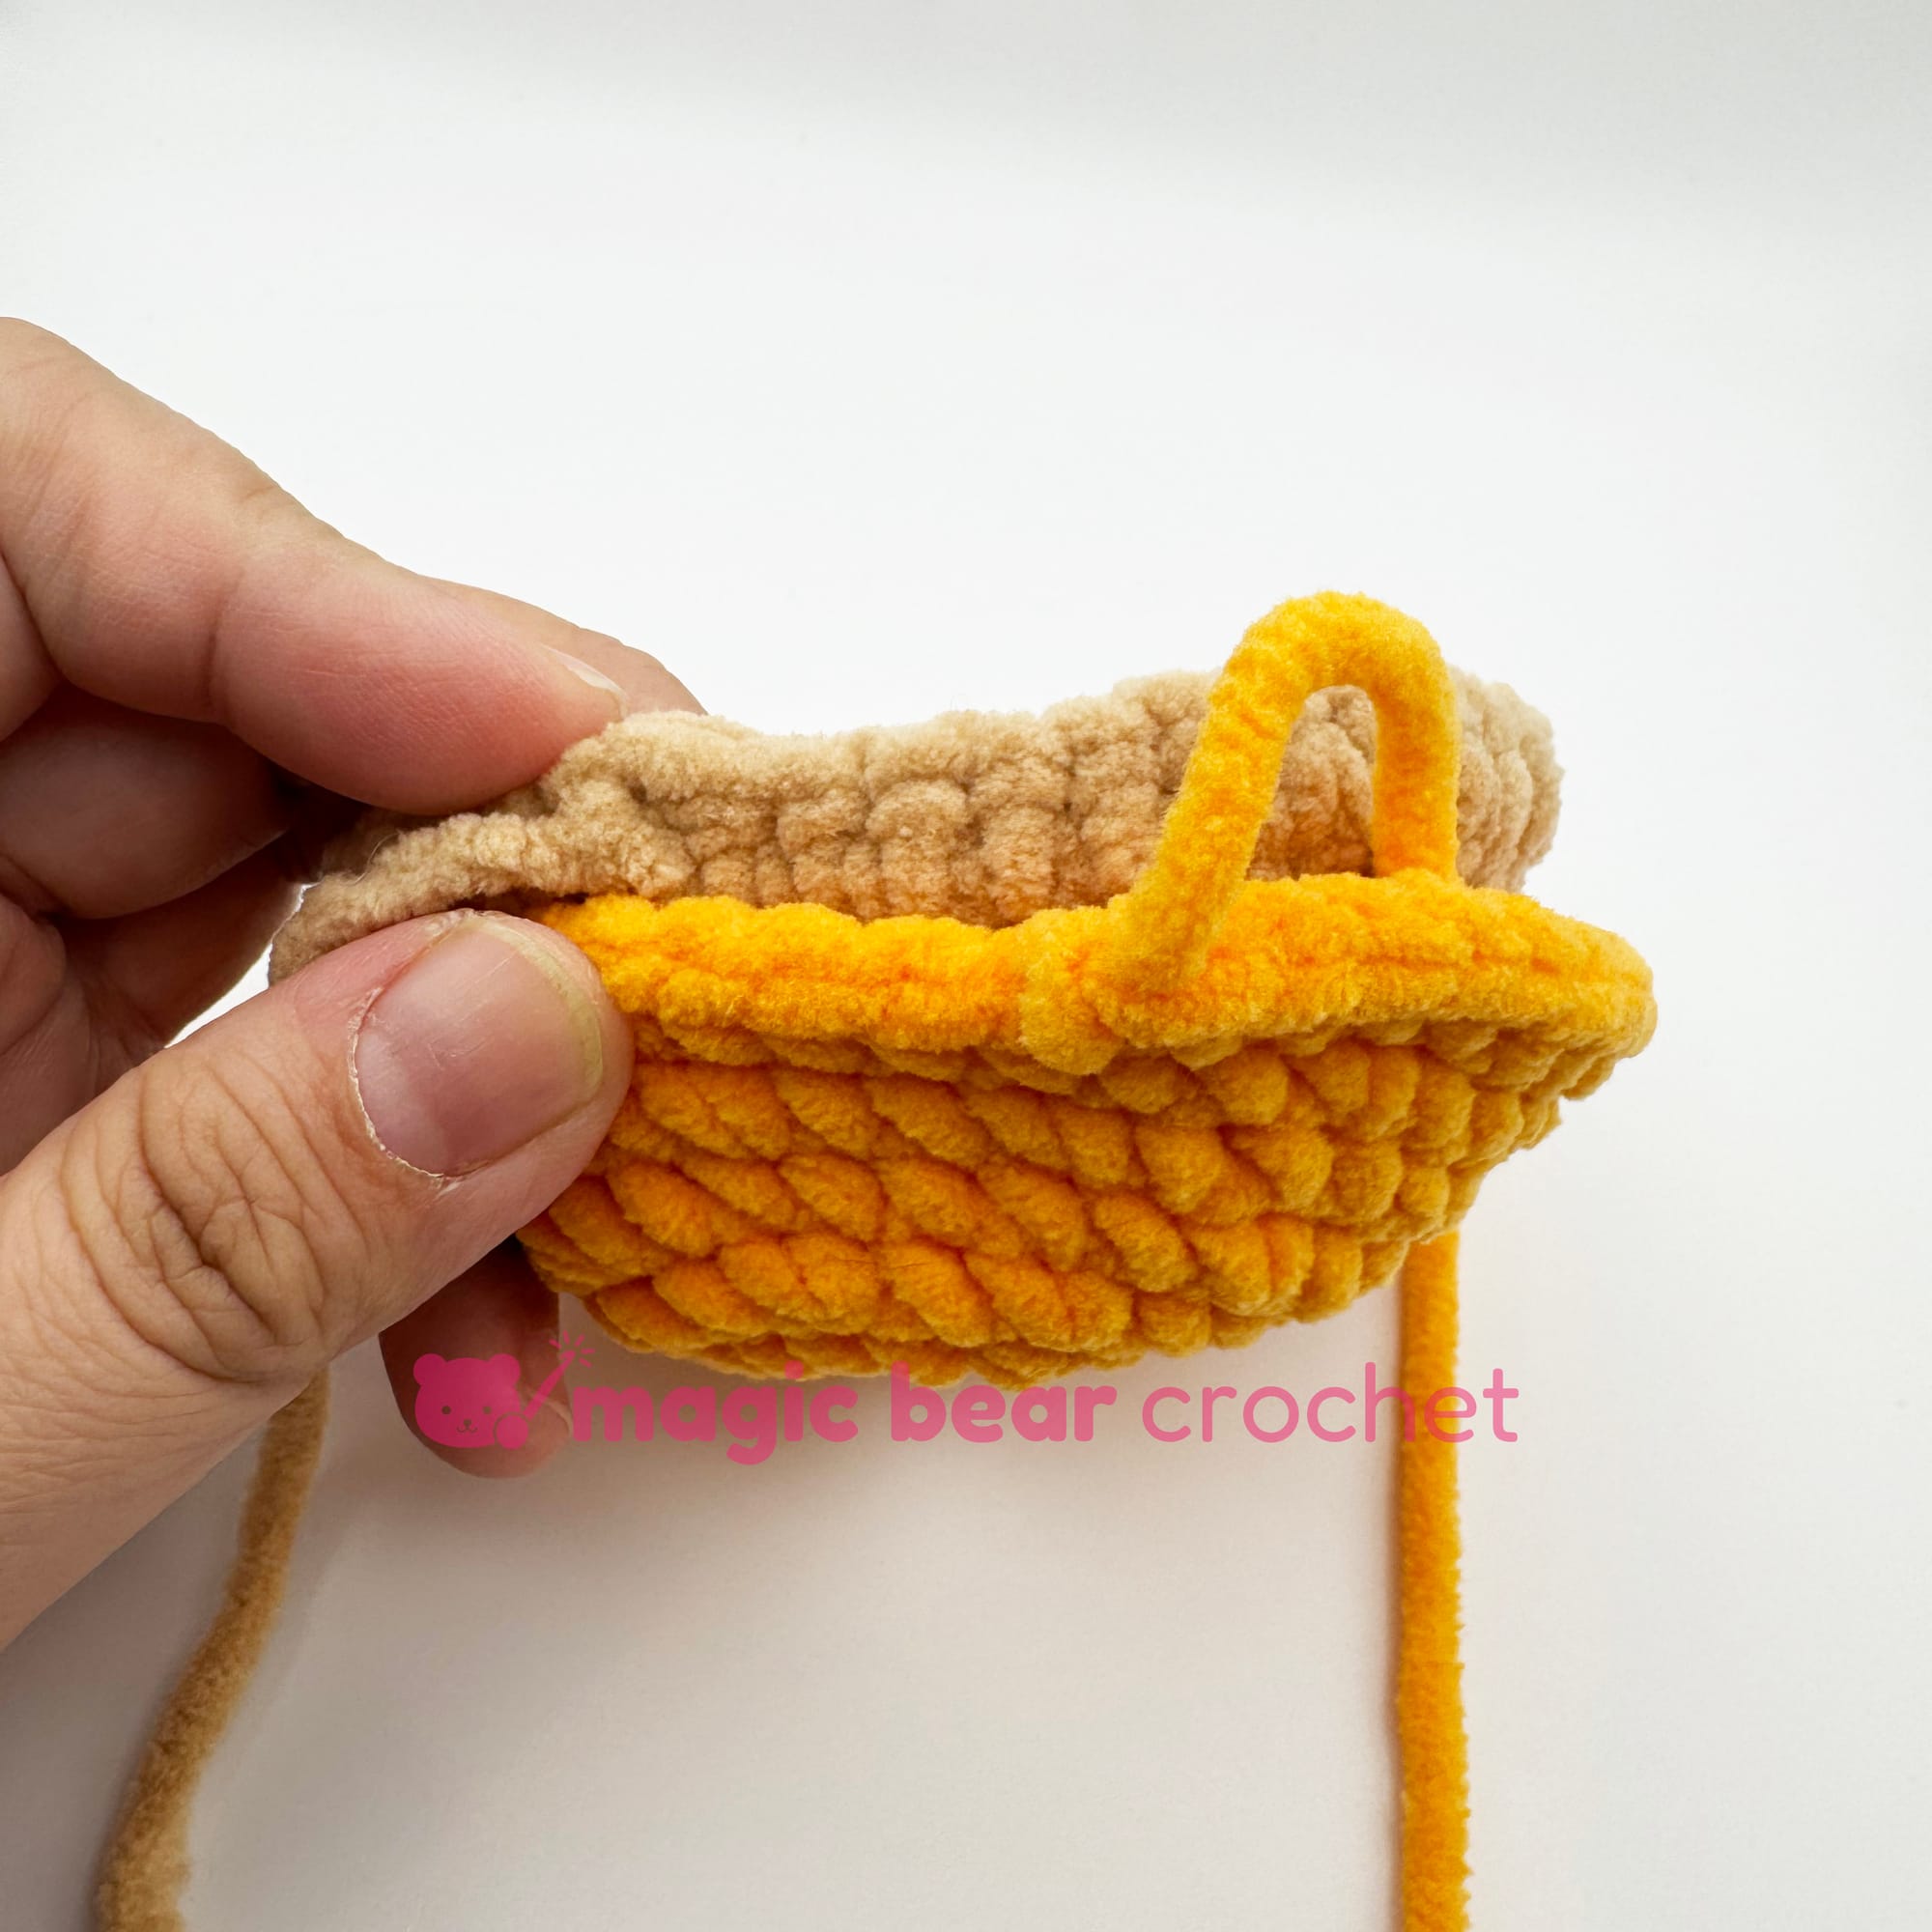
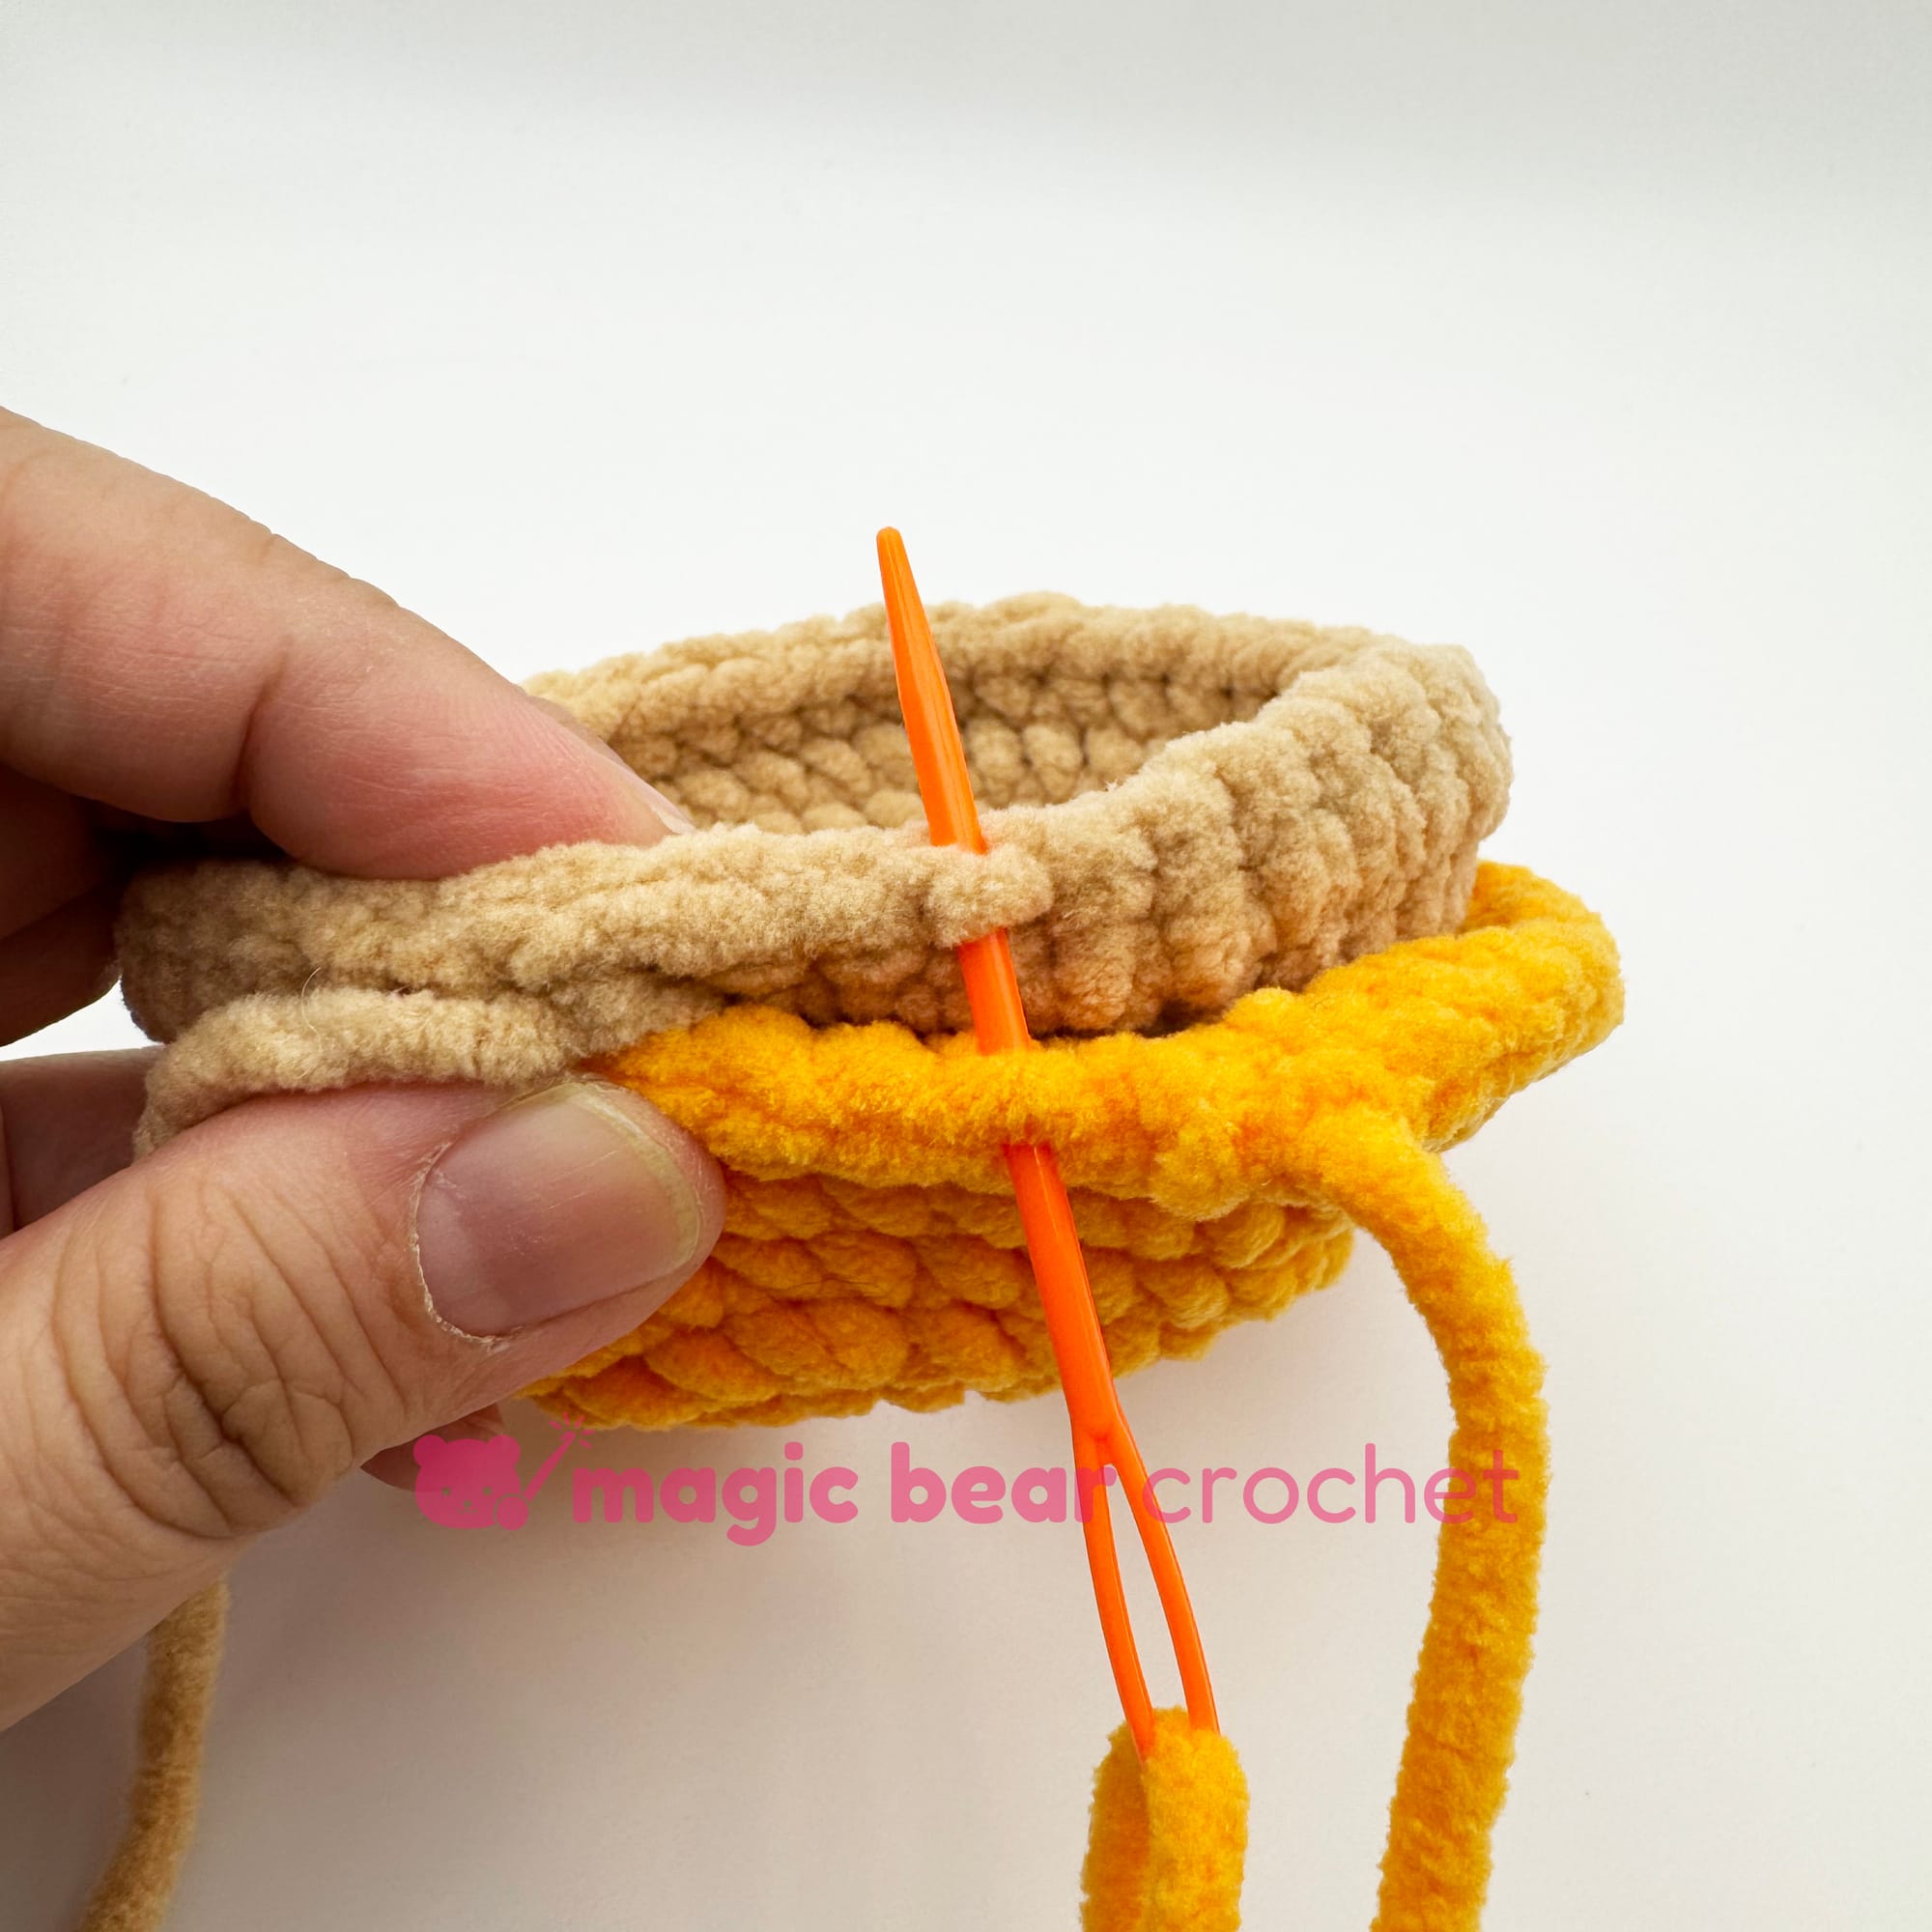
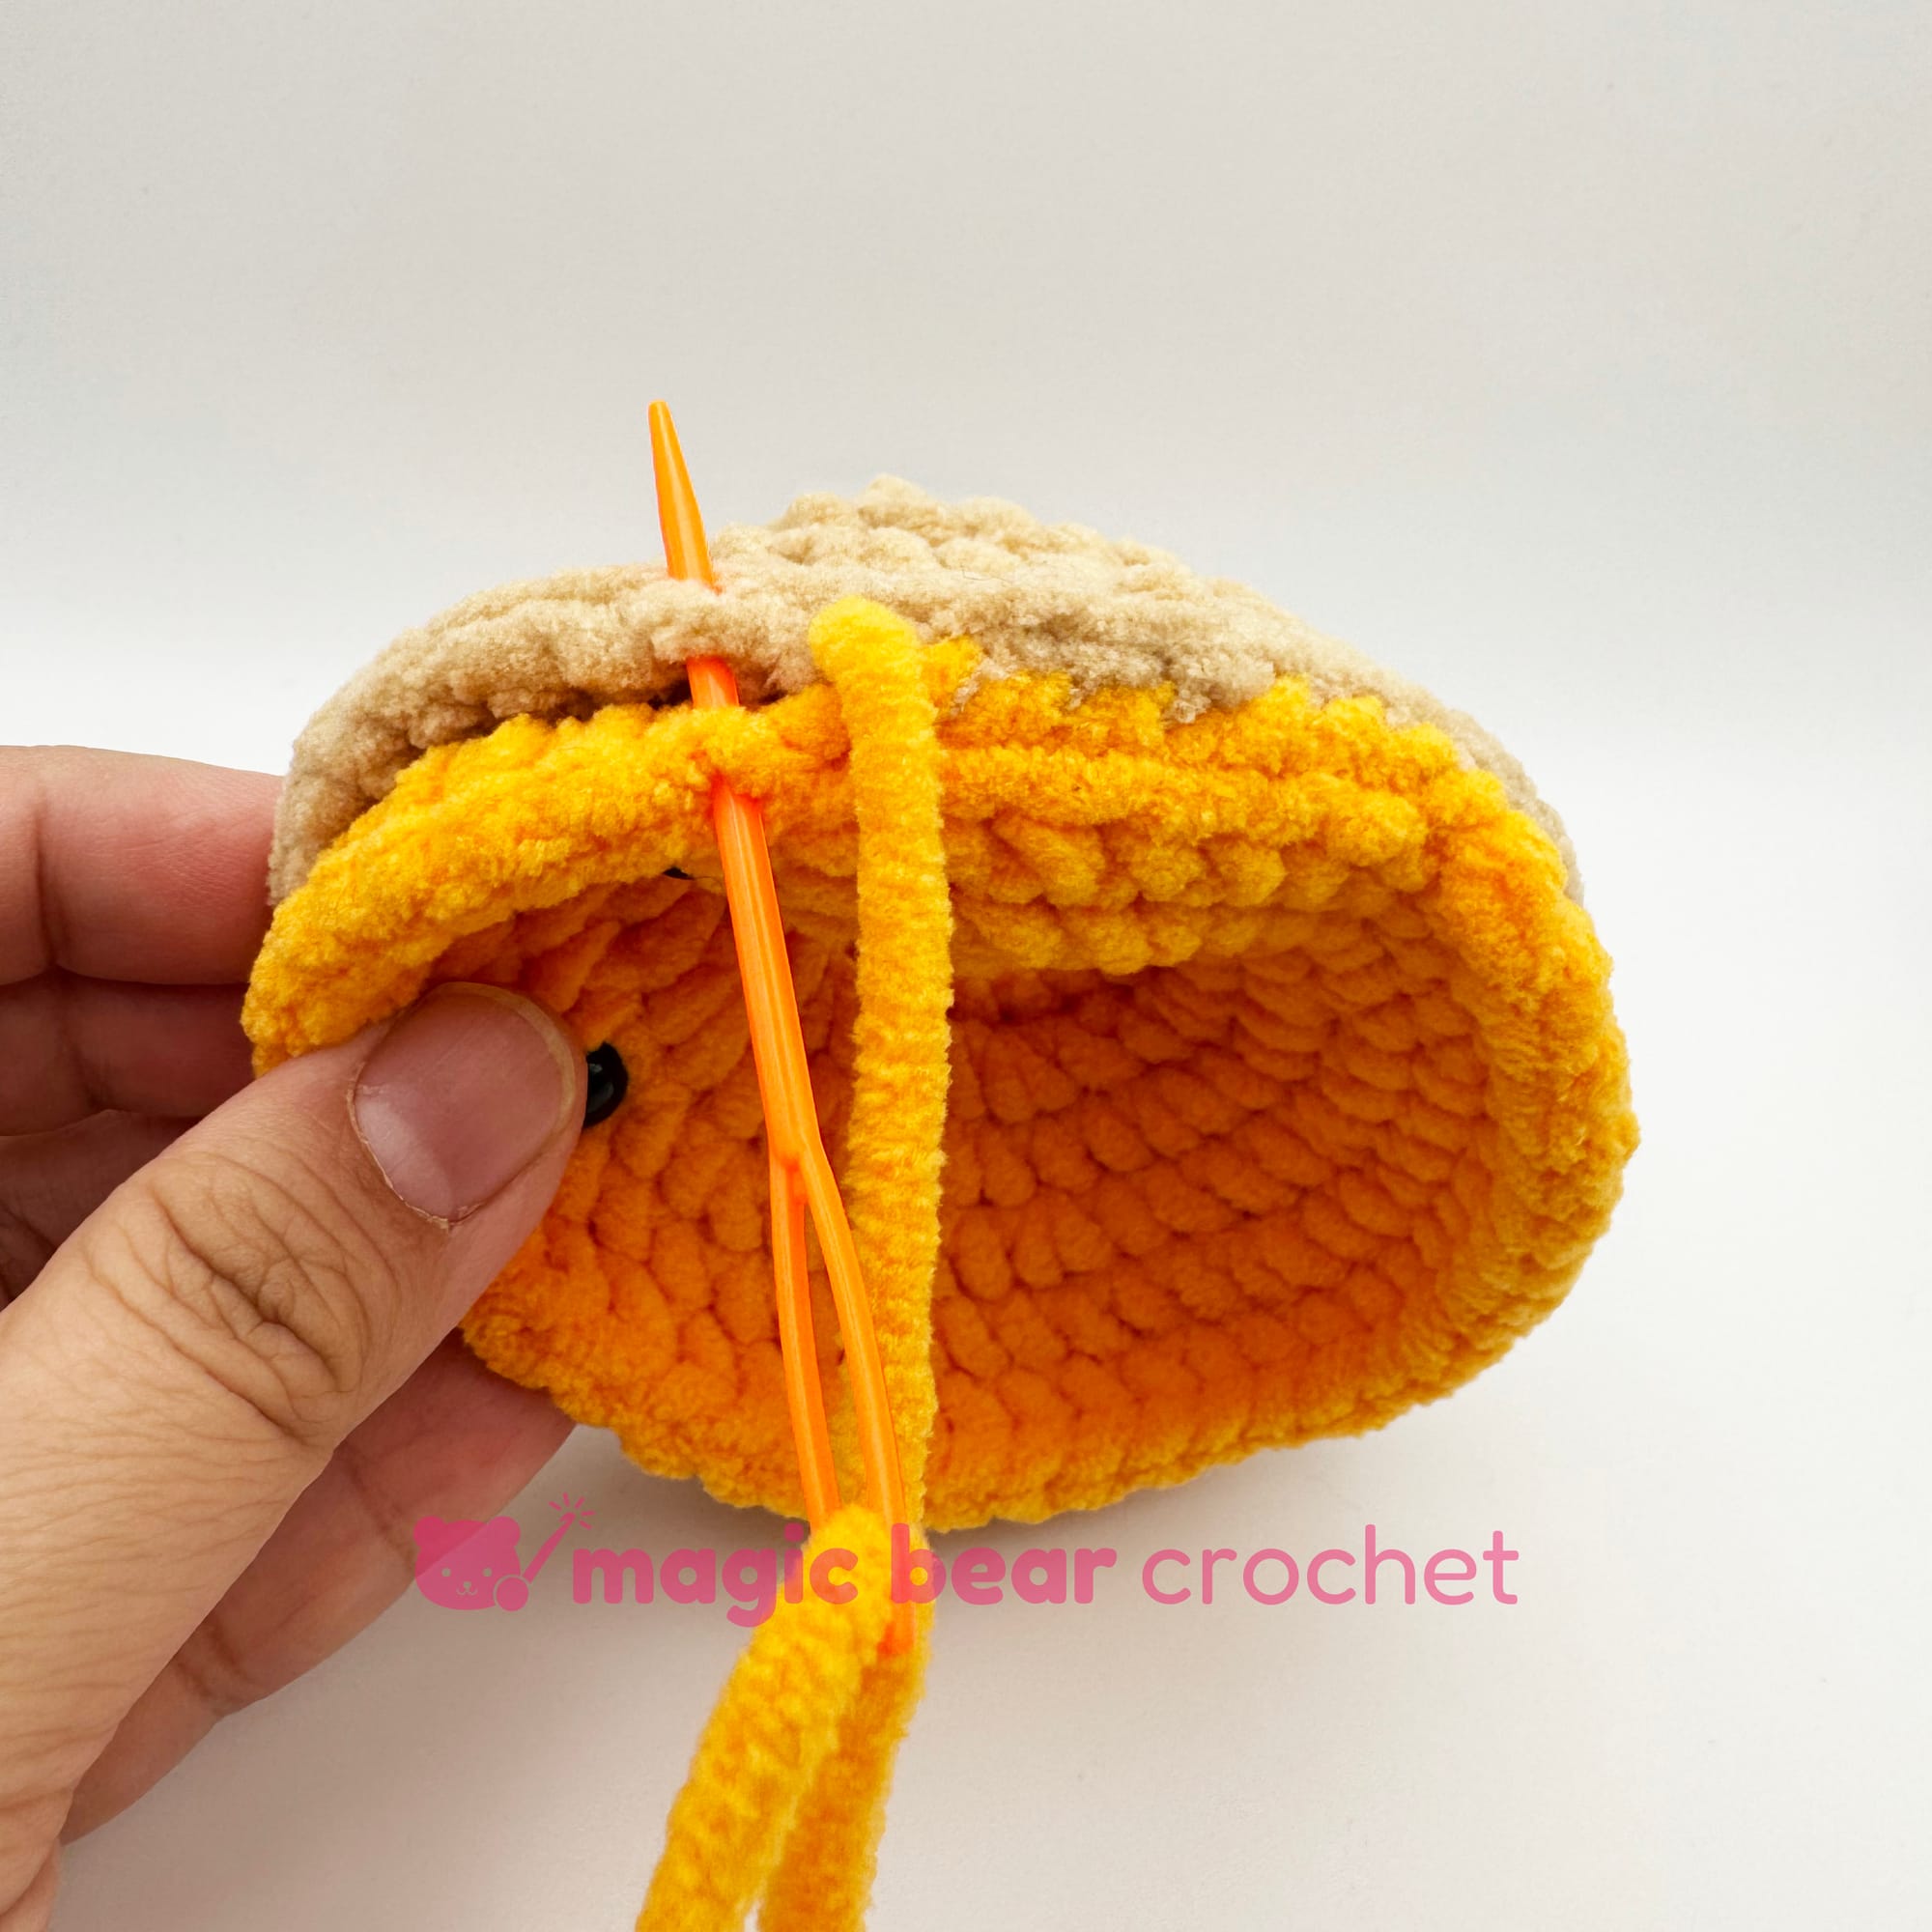
Assembly
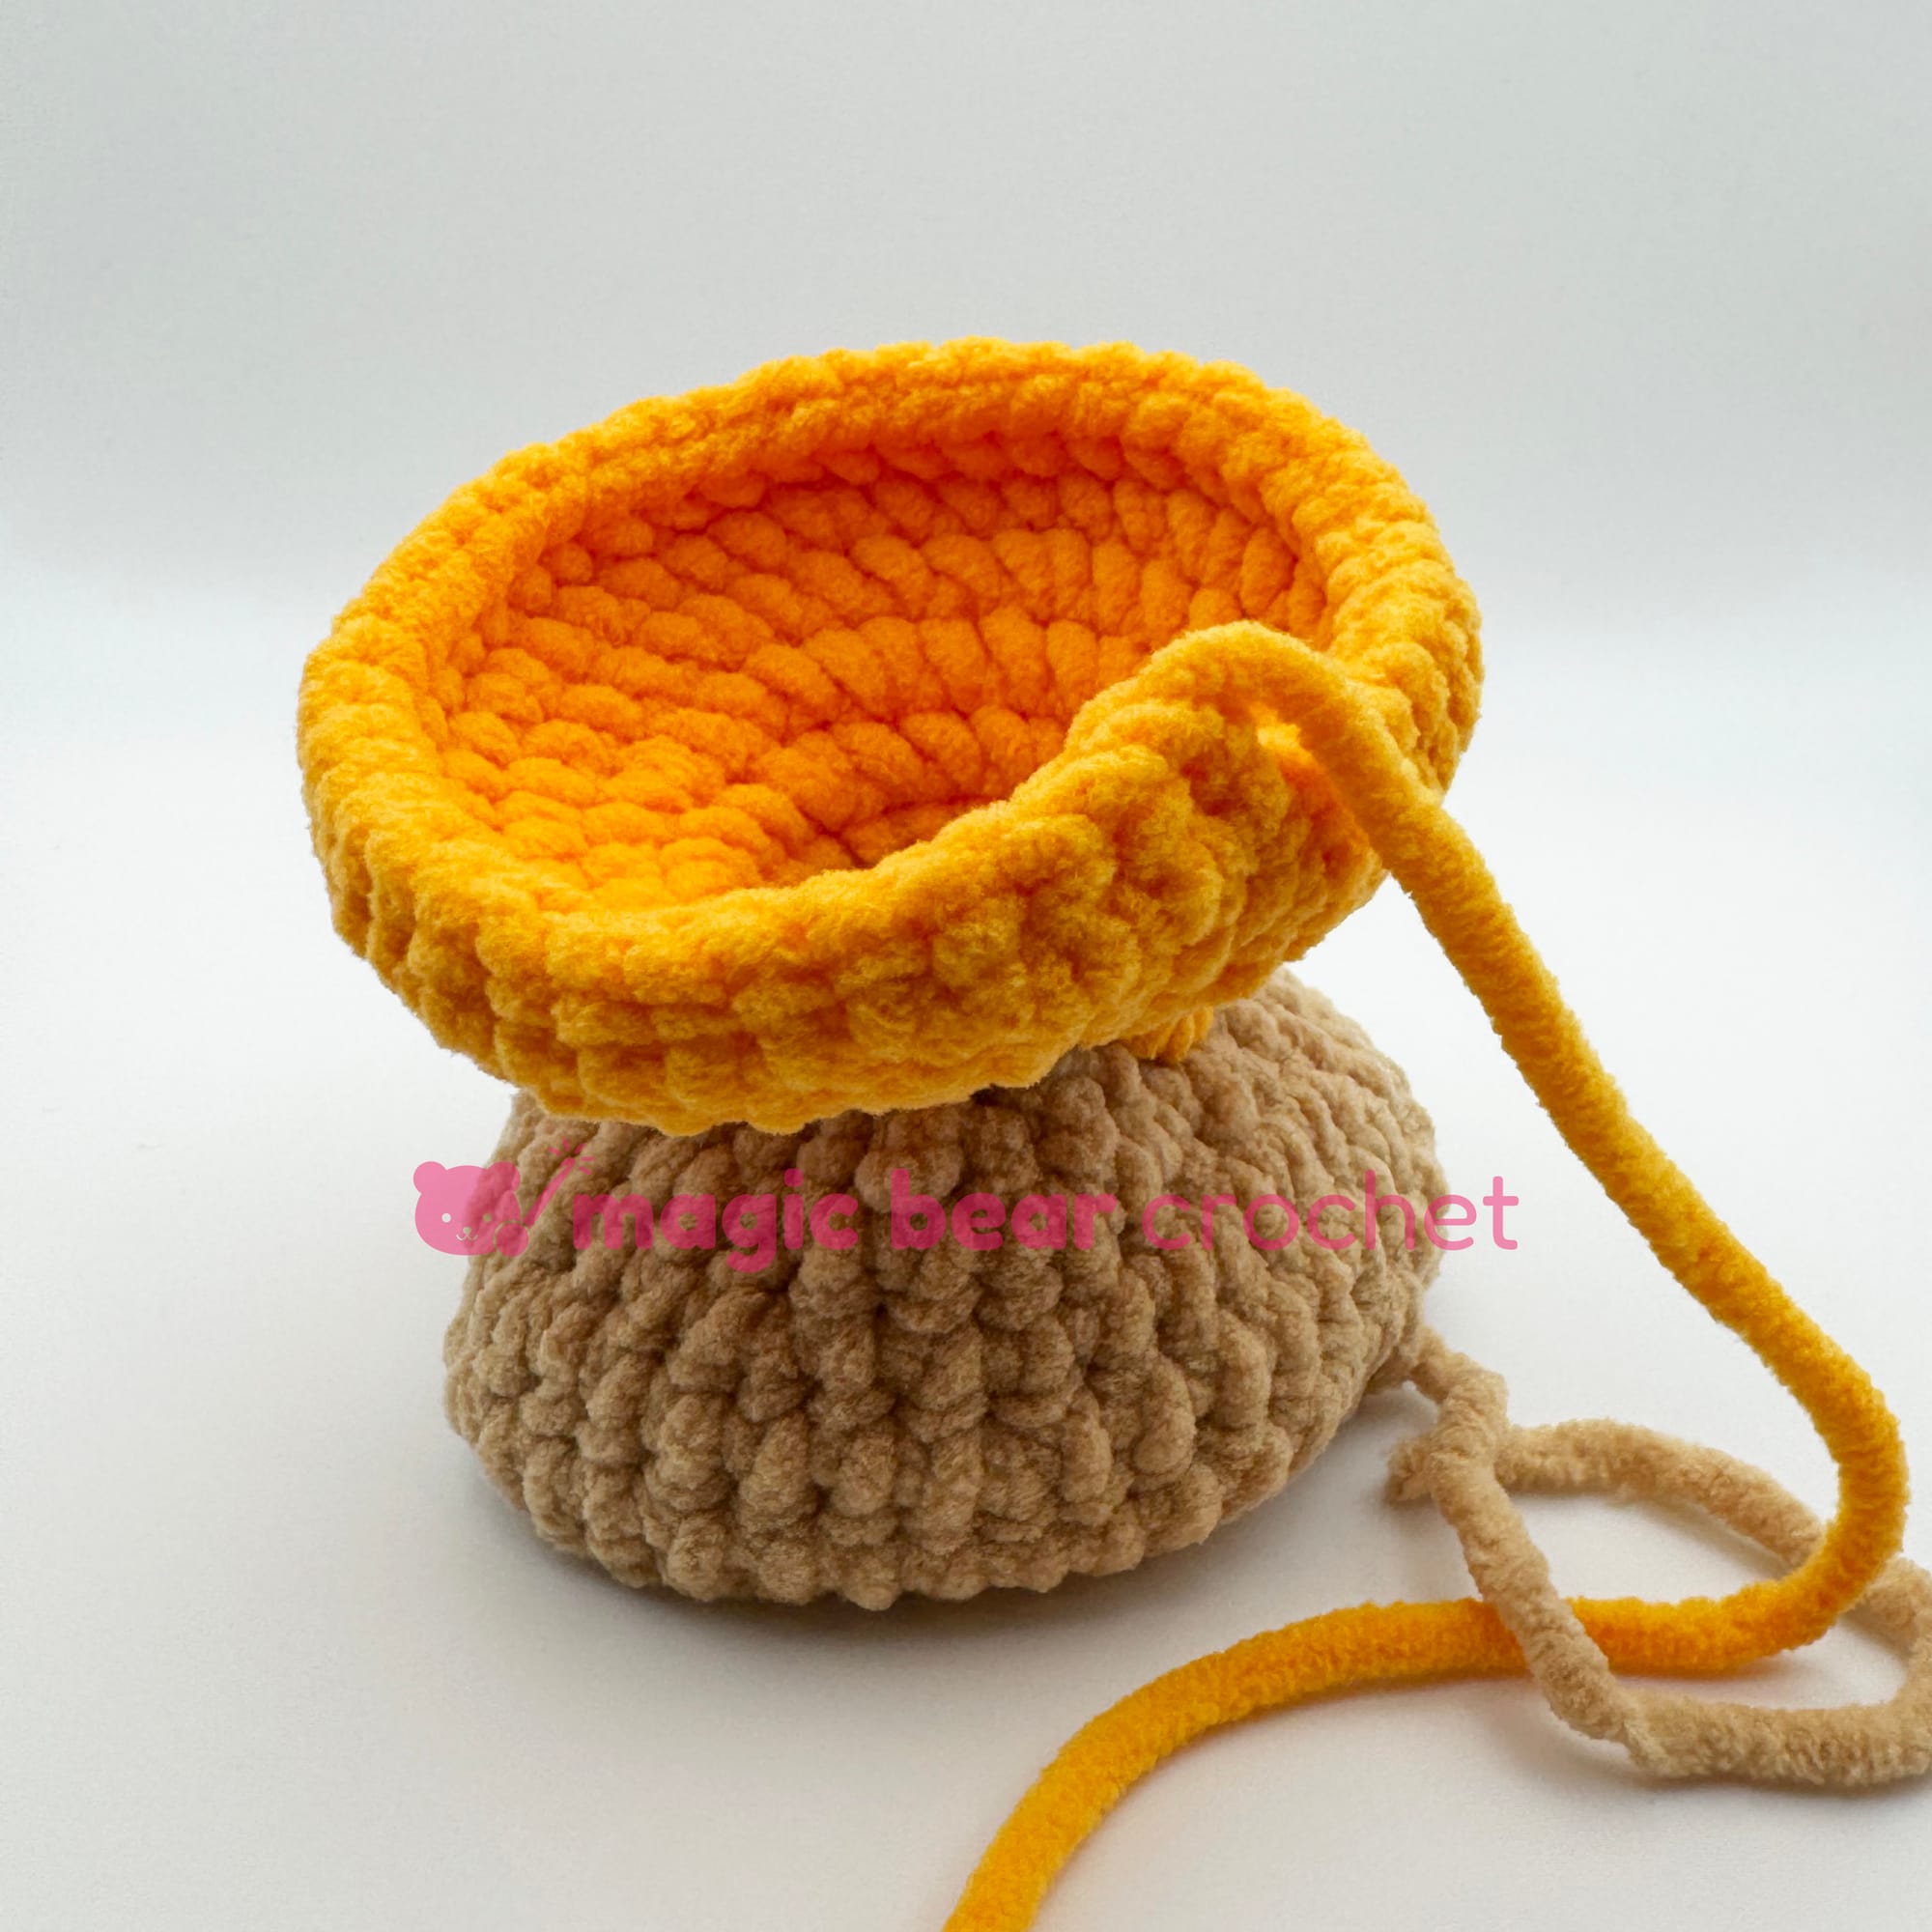
- Fold the piece so the base and frosting are lined up with the frosting side facing you.
- Thread a sewing needle to the tail.
- Whipstitch through the two layers, working only in the back loops of frosting and front loops of base (basically the two loops that are closest together).
- When you have done 1/3 of the circumference, start stuffing the piece.
- Continue working through each stitch and stuffing as you go.
- When you've reached the end, secure yarn and hide the tail inside the piece.
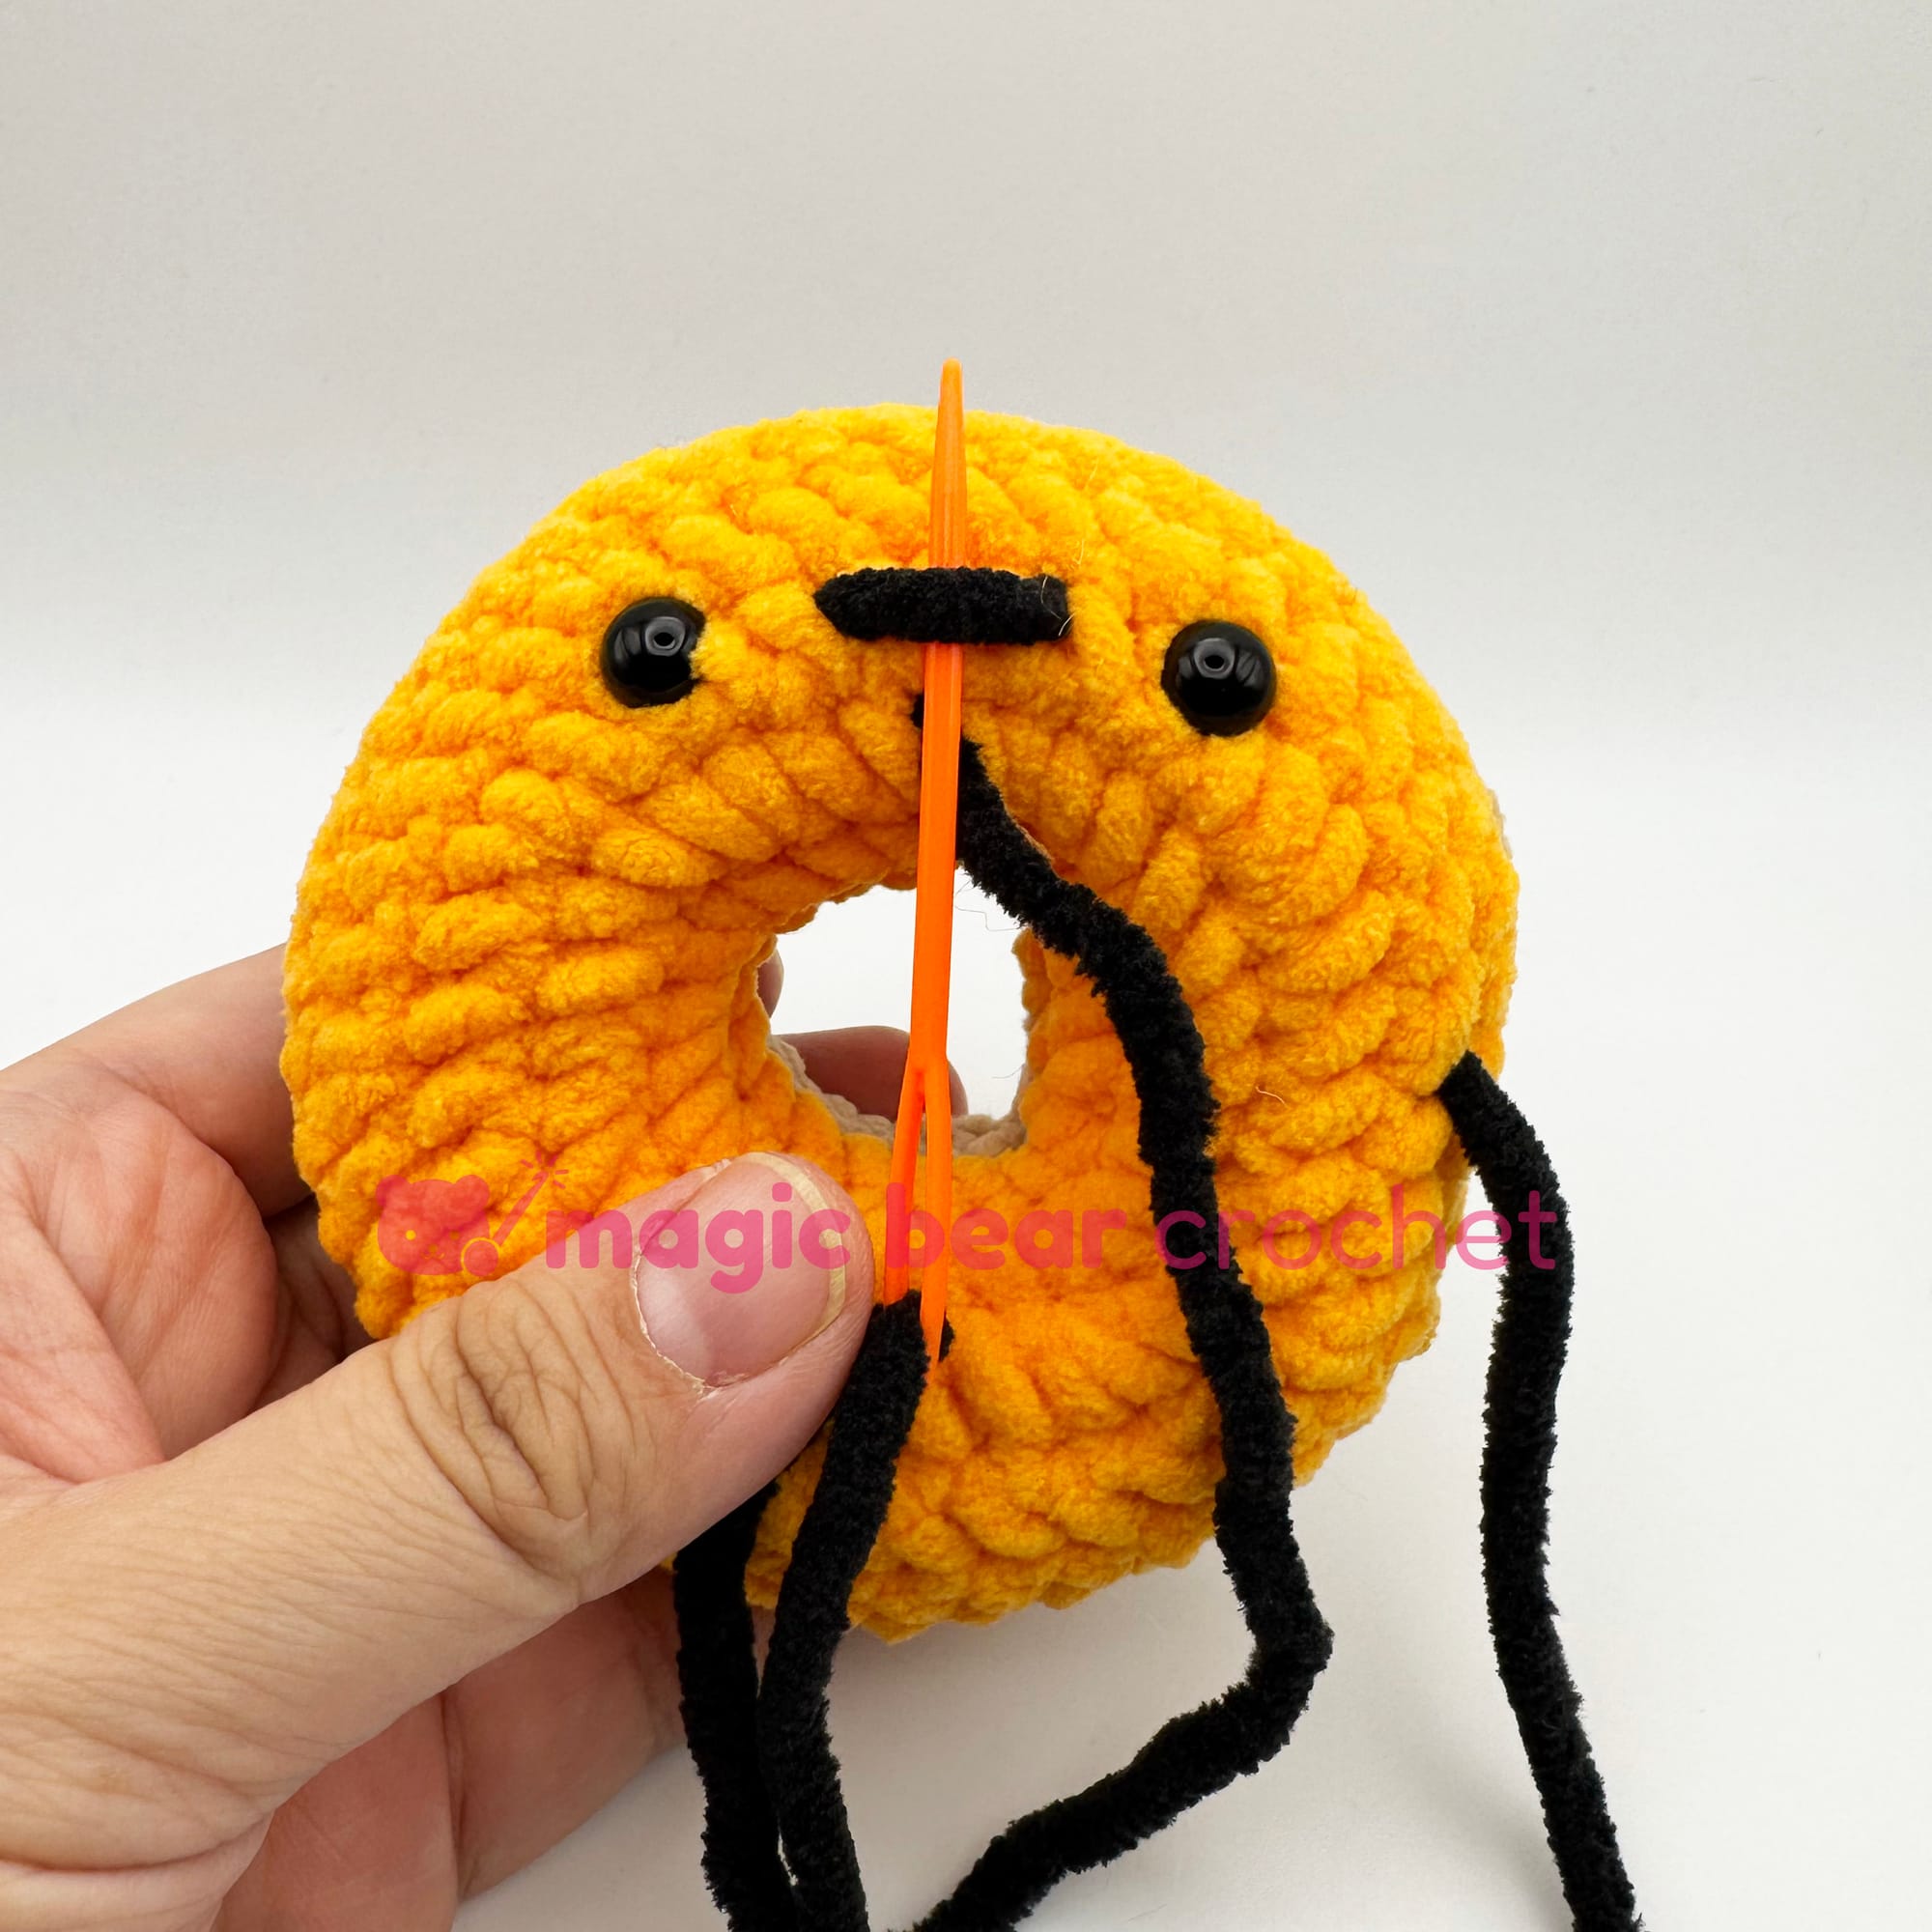
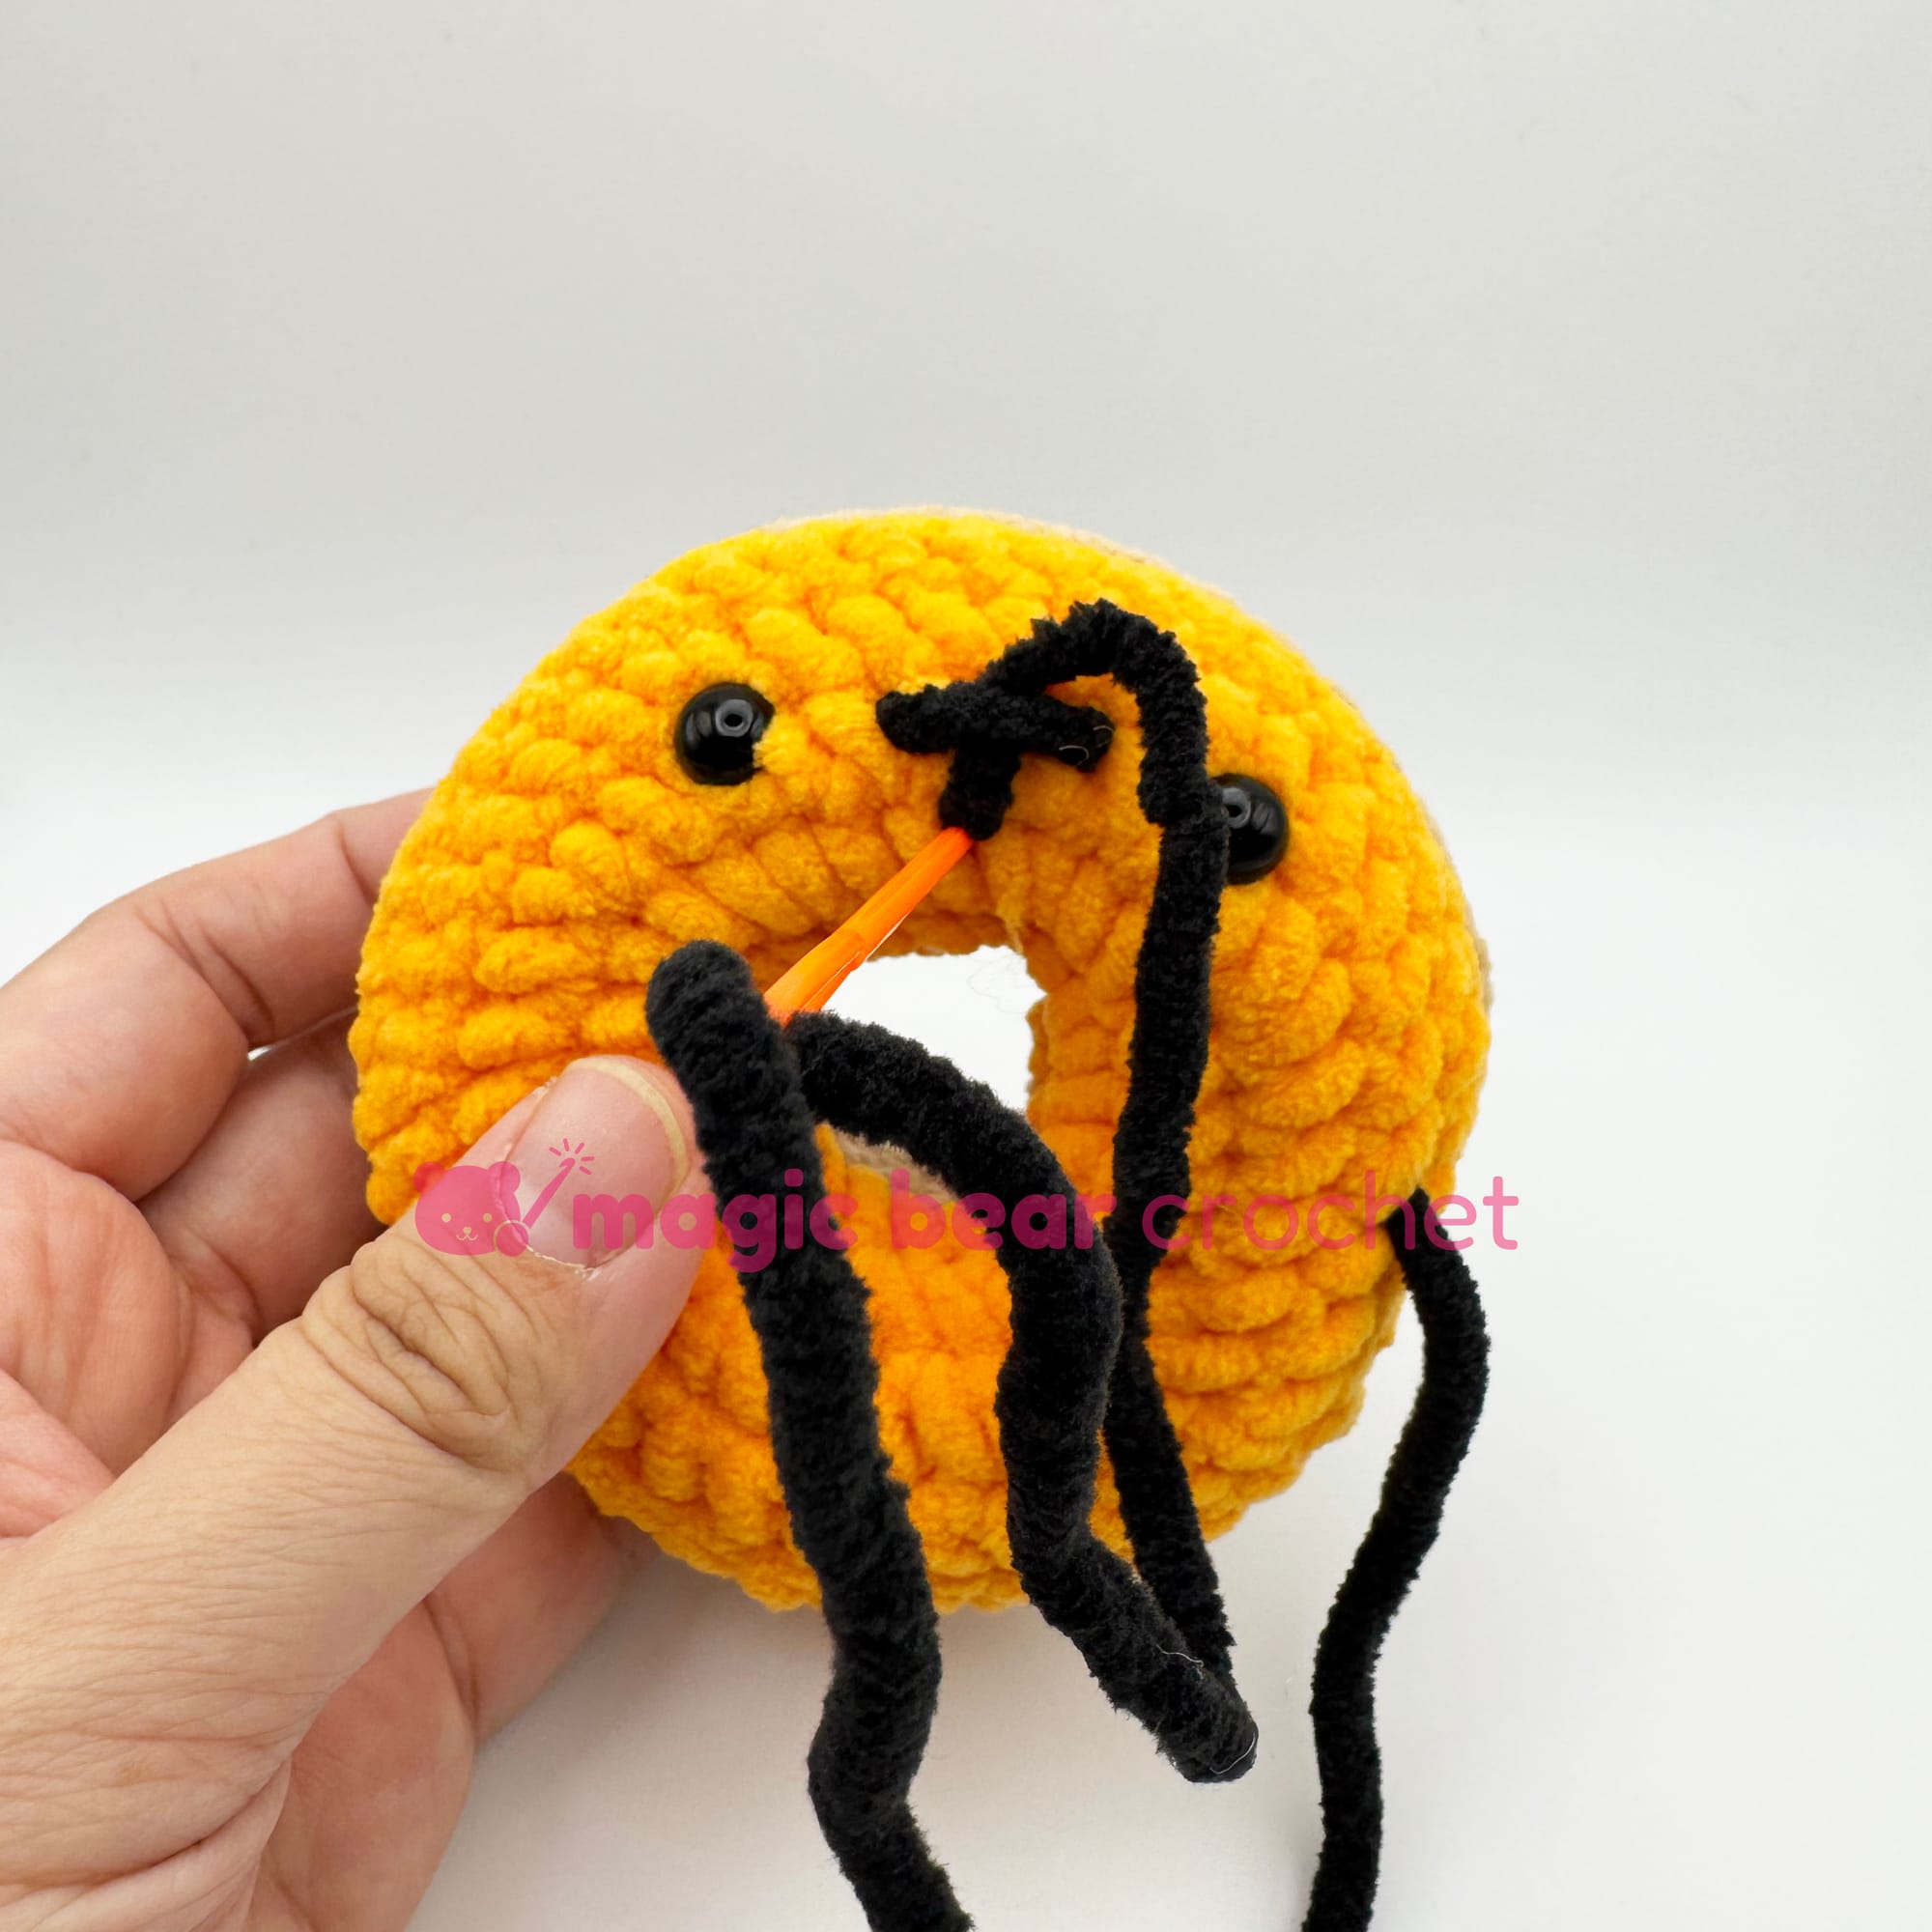
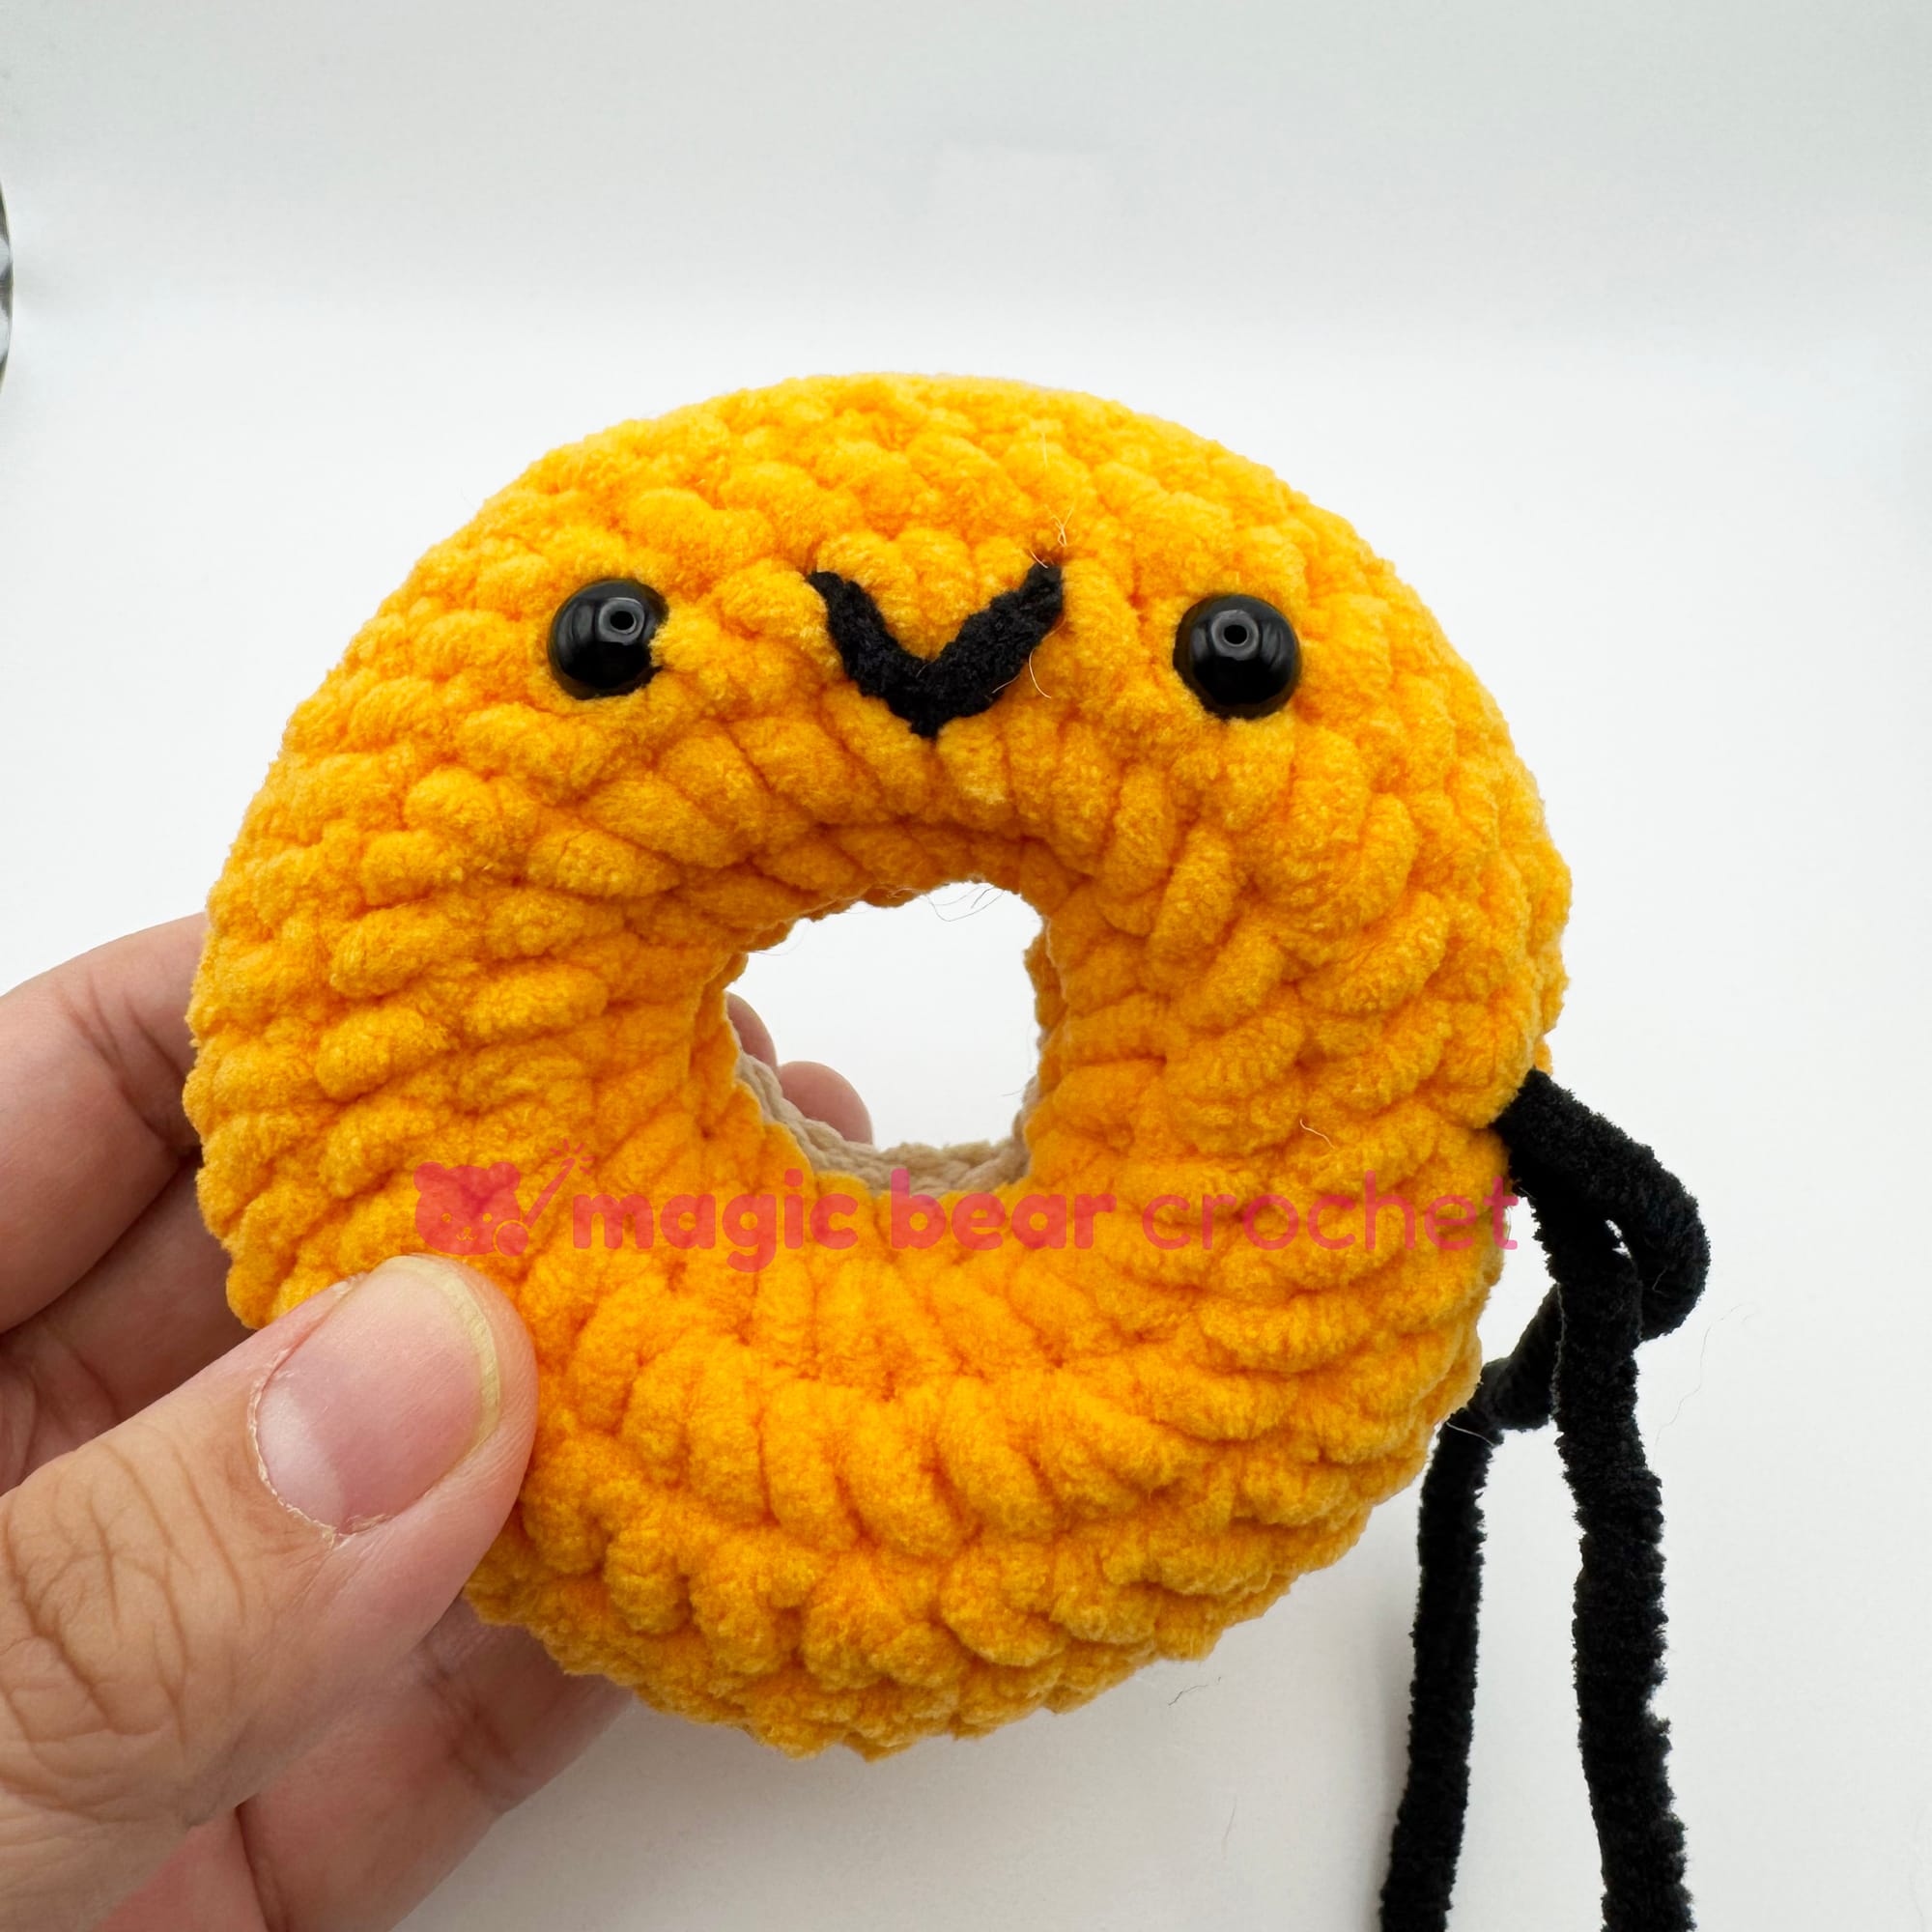
Adding the Face
Mouth Embroidery
- Thread a needle with an arm's length of black yarn.
- Insert the needle somewhere from the side of the piece, and pull it through to 2 stitches to the left of the right eye. Leave a 4 inch tail.
- Insert the needle 3 stitches to the left, where you want the left side of the mouth to be. Pull it out between the two ends of the line and one stitch down. This will be the bottom of the mouth.
- With the needle, "grab" the mouth line and insert the needle back into the same hole it came out of. Pull tight to create a smile with the curve.
- Pull the needle out of the same hole in the piece so that both yarn tails are coming out of the same hole.
- Tie a double knot with both yarn tails as close to the donut as possible. Hide the yarn inside the donut.

Optional Decorations
Sprinkles
Follow the sprinkles instructions to add small yarn stitches in various colors across the frosting.
Icing
Follow the icing instructions to create decorative lines across the frosting surface.
Care Instructions
- Spot clean with a damp cloth
- Air dry only
- Keep away from direct sunlight to prevent fading
- Store in a cool, dry place
Pattern Support
Need help? Contact me at magicbearcrochet@gmail.com
© 2024 Magic Bear Crochet. This pattern is protected by copyright law and is for personal use only. You may sell items made from this pattern in small quantities, but please credit Magic Bear Crochet as the designer. Mass production, distribution, or copying of the pattern itself is prohibited.